In this article, we are going to deep dive into the details of the user interface menu system I have built. I call this game “Medieval Times” because it has a medieval vibe to it. But, as I mentioned in the last article, this is not a real game; the menus were built only for demonstration purposes. If you haven’t read the previous article, I recommend reading it first at: User Interface in Godot: How to Build a Fine Menu (Part 1).
What is a Menu Hierarchy?
A menu hierarchy is a collection of menu screens linked to each other by buttons or some other form of connection. Users can navigate between the menus to perform various actions.
For example, the main menu, which appears when the game application starts, can lead to a load game menu, an options menu, or any other menu your game requires.
Communication System of The Menu Hierarchy
How did I Connect the Menus so the Player can Navigate Between Them?
The menus are connected via Godot’s Signal system. Other terms used for this type of system are an “Event” system or a “Message” system. Signals allow you to send data between nodes when a specific event occurs.
For example, when the player changes a setting in the Options menu, a signal is sent up to the parent menu, which is the menu hierarchy scene, and the menu hierarchy handles the internal logic and applying this setting in the game. This architecture works well since it strips away the responsibility of switching menus and other logic from the children and lets the parent menu be in charge of all logic.
Does the Menu Hierarchy Also Need to Send Signals to Its Child Menus?
When a button on a certain menu is clicked, a signal is sent to the menu hierarchy to notify about the change. Once the menu hierarchy becomes aware of the event and receives all needed information, there is no need to use signals to notify the child menus because the menu hierarchy has direct access to all child menus. To switch menus, it simply hides or shows its child menu scenes, depending on the button clicked, with no actual scene switching required.
Read More About the Signal System in Godot 4
Want to know more about Godot’s signal system? I have a dedicated article that discusses how to communicate between nodes using signals. It includes several in-depth examples of how to implement signals and how to transfer data along with the signal. Read it here: How to Use Signals for Node Communication.
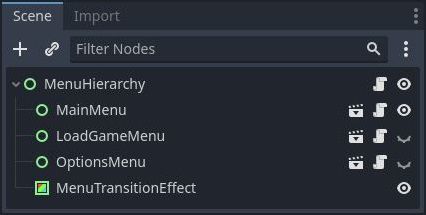
The Structure of the Menu Hierarchy in Medieval Times
The menu hierarchy I have built consists of four components: the Main menu scene, the Options menu scene, the Load Game menu scene, and the menu transition rectangle. We will analyze each of these components and dive into how they work.
Analyzing the Main Menu of Medieval Times
Stretching the Background Image to Occupy the Entire Menu Space
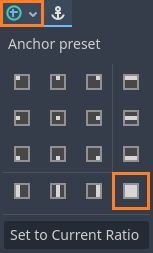
The background image must be the top node since it is drawn first, and everything else is drawn on top of it.
To stretch the background image to occupy the entire menu, you need to set the ‘Anchor Preset’ property to ‘Full Rect.’ You can either change it in the top menu bar or in the ‘Layout’ section of the node.
You can see how the scene tree is structured in the attached image.
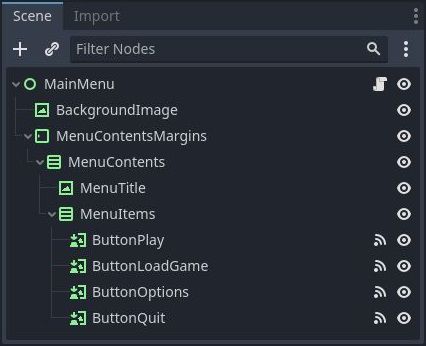
Why Use a Margin Container for the Menu Contents?
It simply looks better. You don’t want the title or any other user interface element to be too close to the window’s edges. The ‘MenuContentsMargins’ node (see the image above) is a Margin Container set with a margin of 64 pixels. This means that regardless of the window size, the menu contents will always be positioned 64 pixels away from the window boundaries on all sides.
What Does the ‘MenuContents’ Node Do?
The ‘MenuContents’ node is a VBoxContainer, which arranges the contents of the menu in a vertical list. Inside this list, I have the menu title and the ‘MenuItems’ list, which contains all the buttons. The reason I have two separate vertical lists instead of just one is that I want to manipulate the menu items (buttons) independently of the menu title. For example, I might want to keep the menu title at the top while placing the buttons in the center of the window.
That’s not to say you can’t use a single list and adjust the buttons the way you want them to look, but this approach seems to offer more flexibility when experimenting with and changing the menu layout.
How Is the Menu Title Designed?
The menu title is not a text label created inside the Godot editor; it is a pure image I have created outside of Godot. This holds true for all menu titles in this example.
The reason for this decision is simple: Godot does not have the tools to create these types of text effects in the editor. Applying these effects in Photoshop and importing them into Godot as a pure image currently appears to be the better solution. If you don’t want to use these fancy text effects and decorations, you can use the simple text label node in Godot and modify its appearance a bit to make it look more appealing.
You could also use shaders to modify the appearance of the text, but that’s much harder to implement and experiment with.
The Menu Buttons Are Actually Texture Buttons
A ‘TextureButton’ node is a type of button that allows you to define a texture for each of the button’s states (normal/hovered/pressed/disabled) instead of using a text label. Again, this choice is purely for appearance reasons. The downside, however, is that if you want to make a change in how your buttons or menu looks, you need to modify and export all the images again in your art software (for me, it’s Photoshop). This is not ideal since it can be time-consuming and a lot of work.
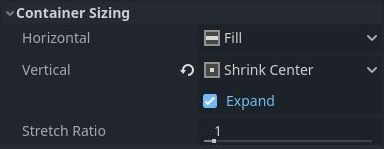
How Are the Buttons Centered While the Title Is at the Top?
To center the buttons, I changed the ‘MenuItems’ list to be centered and expanded in the vertical axis.
This ensures that the list will occupy the entire parent node, and the list of buttons will be centered within it.
Analyzing the Options Menu of Medieval Times
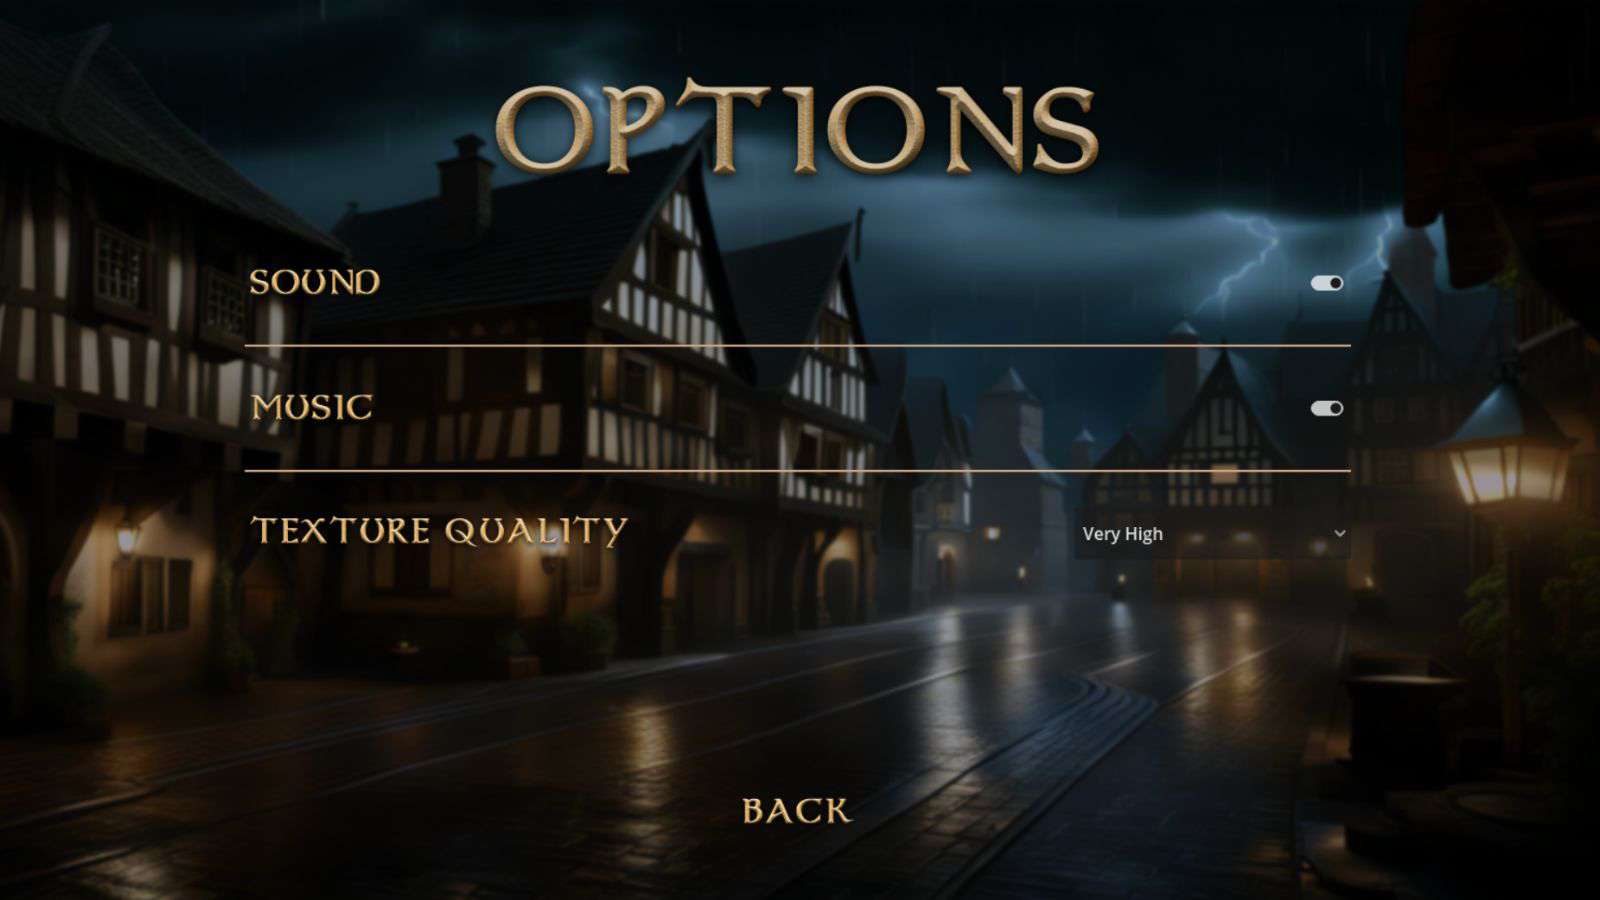
What Is the General Structure of the Options Menu?
The general node structure is similar to the Main menu. The background image goes first, stretched across the entire menu.
The difference here lies in the menu items. The Main menu only had buttons, whereas the Options menu has fields. Each field consists of two distinct elements: a field name (label) and the field controller (checkbox/slider/multi-choice box, and so on).
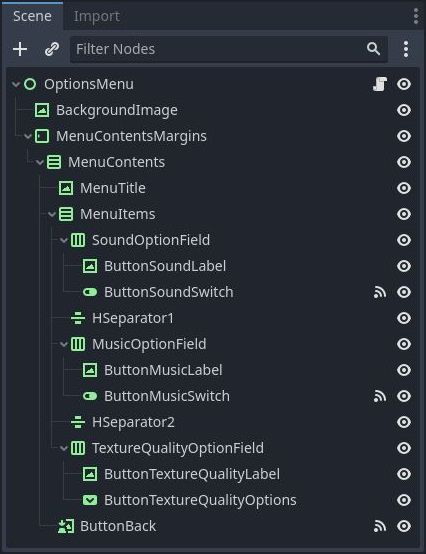
You can see the full scene tree of the options menu in the attached image.
Why Do We Need Those Two Elements for a Single Option Field? You could add text to some of the button controls, but this creates problems. For example, clicking on the text of the button will flip the switch. This is not the expected behavior, usually, because there is likely some distance between the text and the button itself. It doesn’t make sense to toggle the button when pressing on the text, that’s why we need two distinct elements here.
The Layout of the Option Fields
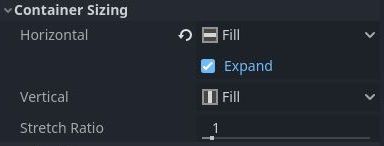
The layout of each option field is quite simple. Each field is an HBoxContainer that organizes all its children in a row.
The text is automatically pushed to the right, and the button is placed to the left of the screen by default when both the text and CheckButton nodes are filled and stretched.
A Word About the Text Labels of the Option Fields
All the text labels for the option fields are actually TextureRects and not Label Nodes. Again, it’s not really possible to apply the text effects I wanted inside the Godot editor, so I created all the necessary text in Photoshop and exported it as images. This creates an issue when trying to adapt the image to the field.
The size of the text image really matters since Godot will display the entire image. If your images are not the same height or not centered correctly, you will notice inconsistencies in the positioning of the text. The solution for this type of setup is as follows:
- The width of the images should be the exact width of the text. This is to align all fields on the x-axis (ensuring that all fields start from the same x position).
- The height of the images should be constant and independent of the text’s height. This ensures that the text fields have the same vertical spacing between them on the y-axis.
Why Are There So Many Nodes in the Scene?
It doesn’t have to be this way, and it’s not an optimal approach. A more appropriate solution is to create a dedicated scene for each field. So the ‘SoundOptionField’ should be a separate scene, the ‘MusicOptionField’ should be its own scene, and the ‘TextureQualityOptionField’ should also be a separate scene. This way, you can easily duplicate ab option field scene as many times as needed and control each of them as an encapsulated entity (remember the encapsulation principle of OOP?).
Analyzing the Load Game Menu of Medieval Times
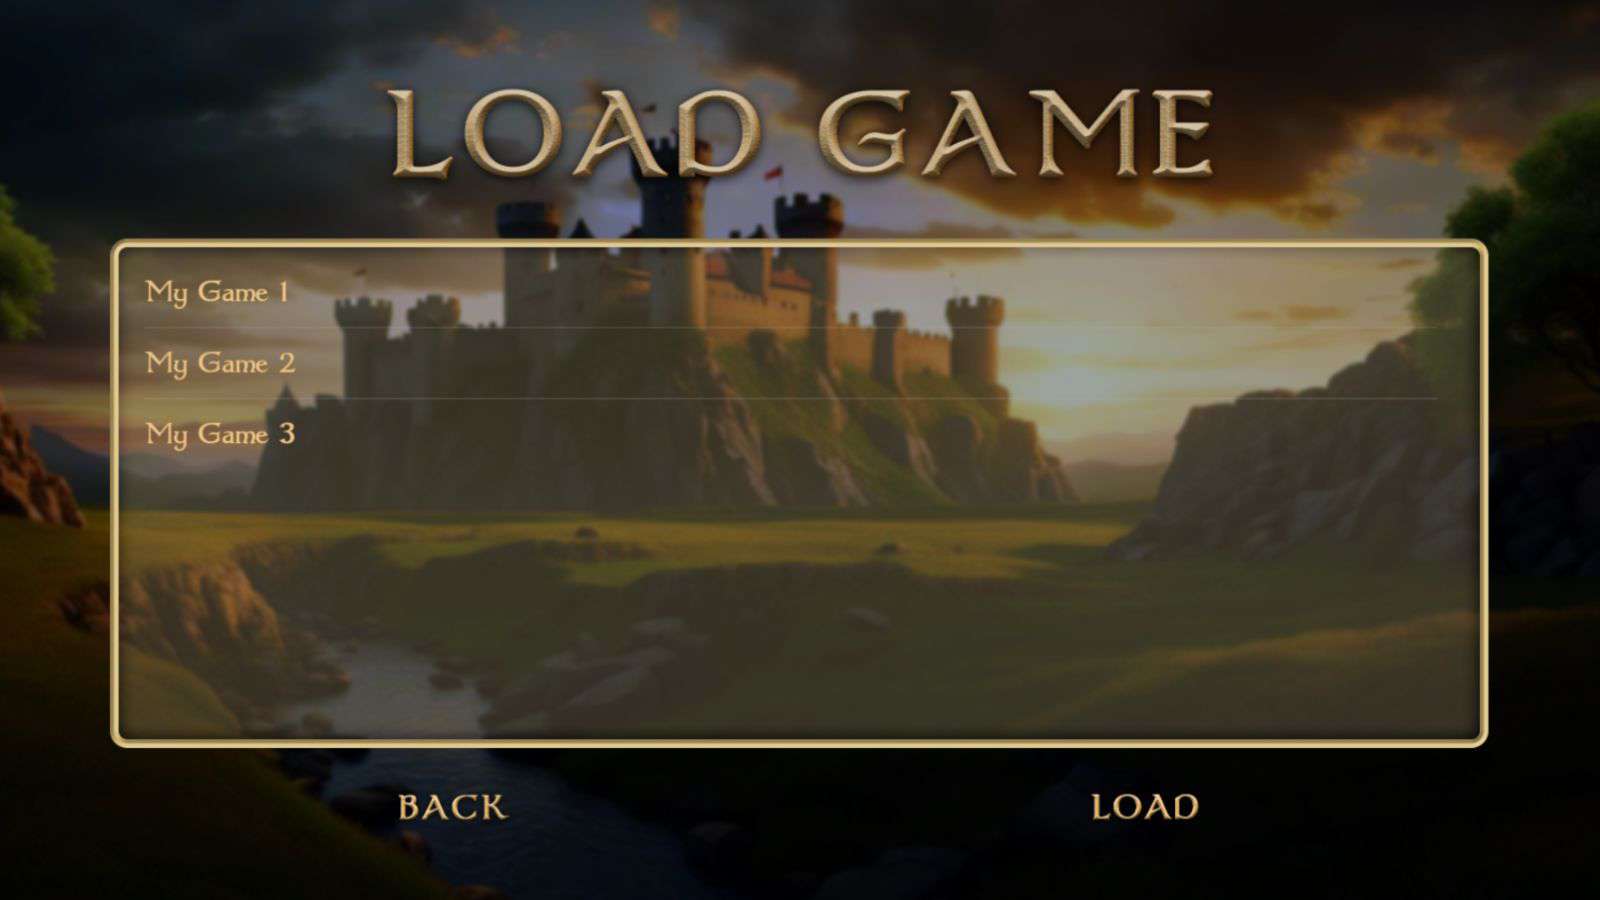
What Is So Unique About the Load Game Menu?
Instead of buttons or fields, the Load Game menu contains a panel with the names of the saved files. Additionally, it has two buttons at the bottom of the screen.
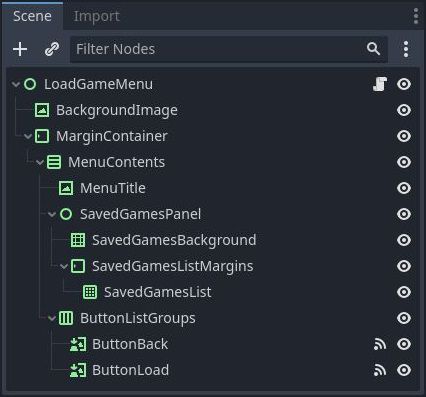
The ‘SavedGamesPanel’ node (see the attached image) mainly consists of two types of nodes: the NinePatchRect node for the panel background and the ItemList node that holds all the saved game names.
Can I Create a Scene for the Saved Games Panel? Just like with the option fields in the Options menu, you could group the NinePatchRect node with the ItemList node and create a new scene to nicely encapsulate them and have better control over this entity.
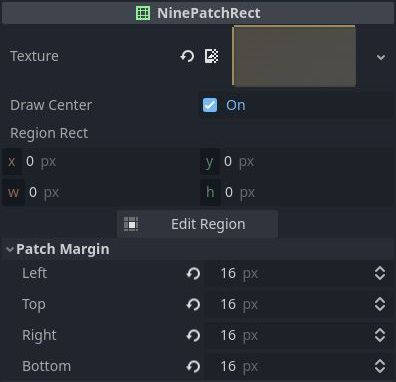
What Is a NinePatchRect Node in Godot 4?
If you are not familiar with the NinePatchRect node, the previous article about User Interface in Godot 4 explains the concept.
In short, it allows stretching the center part of an image while keeping the edges in place. This is a useful technique to use when creating panels with varying sizes.
You can read the detailed documentation of the NinePatchRect node in the official Godot documentation website: https://docs.godotengine.org/en/stable/classes/class_ninepatchrect.html.
The ItemList Node Is the Meat and Potatoes of the Menu
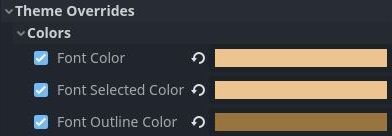
The ItemList, named ‘SavedGamesList,’ is a special node containing a list of text lines, with each line representing a saved game file. You can customize the node’s theme to adjust its appearance, such as modifying the colors of an item when it is selected.
You can see the color choices I made for the font, selected item, and text outline colors. Choosing these colors takes some time and experimentation, but once you land on nice colors, it looks beautiful.
How to Handle the Logic of the Saved Games Item List?
Most of the logic for clearing and populating the list with the correct values is up to you. You must implement this logic in GDScript (or C# if you are using the Mono version of Godot). However, all functionality related to arranging the items in the list, capturing and reacting to click events, scrolling, and so on, is handled by the node itself. You get all of that for free!
Arrangement of the Buttons at the Bottom of the Menu
The buttons at the bottom of the menu are pushed down by the panel since the panel is expanded, and the ‘ButtonListGroup’ node is centered. Each of the button nodes is filled and expanded in the horizontal axis. Expanding both buttons in the horizontal axis ensures that they take an equal amount of space.
To make them centered (each in their own box), I changed the ‘Stretch Mode’ property of the TextureButton to ‘Keep Aspect Centered’, as you can see in the attached image.
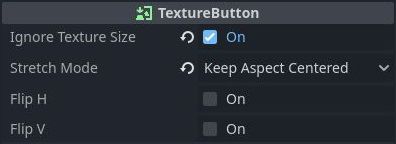
This option ensures that the image maintains its aspect ratio regardless of its size constraints and keeps it centered in its bounding box. The ‘Ignore Texture Size’ property allows the image to grow or shrink in size, depending on the size constraints of the parent.
What About Transitions Between the Menus?
To transition between menus, I decided to go with a simple fade-in/fade-out effect, but you can choose any type of effect you find suitable for your game. I achieved this by using a black ColorRect node, which is part of the menu hierarchy scene.
When the player transitions between menus, the ColorRect’s alpha channel gradually changes from 0.0 to 1.0, meaning it goes from completely transparent to completely opaque. When the screen is black, the next menu is shown, the previous menu is hidden, and the ColorRect alpha channel is reversed, going from 1.0 back to 0.0.
The changes in alpha are possible thanks to the ‘Tween’ system in Godot. Every node in Godot 4 can create its own Tween object, which can be used to modify properties of the node over time. There are different types of Tweeners, but we won’t go into that topic. I implemented the alpha color tween in the script of the menu hierarchy node.
Conclusion
In the next and final article of this series, I will discuss menu feel and how to capture the player’s attention, increasing the likelihood that they will want to play your game.
I use the Godot 4 game engine to create my games, and as time goes by, this engine continues to grow in power and capabilities. Check out the other articles on my blog; I guarantee you will learn useful things that will aid you on your game development journey: Night Quest Games Blog. Good luck!
If the information in this article was helpful to you, please consider supporting this blog through a donation. Your contributions are greatly appreciated and allow me to continue maintaining and developing this blog. Thank you!


