Godot 4 is the latest version of the popular open-source Godot game engine, and the process of adding collision to Tilemap nodes has changed dramatically from Godot 3.
The engine now gives you much more control over the collision shapes of each tile you use in your game. This article is a step-by-step guide on how to add collision to a tilemap node in Godot 4.
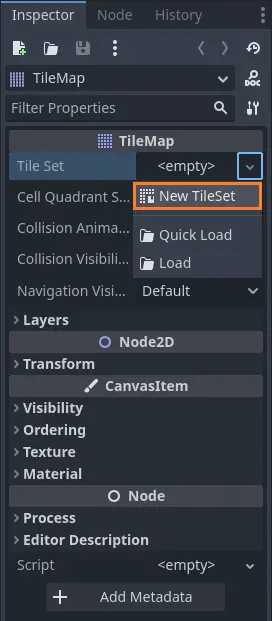
Step 1: Create a New Tileset and Add a Physics Element
Select the TileMap node from the scene tree and click the drop-down box labeled ‘Tile Set’ in the inspector.
In that box, you will find a ‘New TileSet’ button. Click on it to create a new TileSet. Once it is created, you will see a ‘TileSet’ text inside the drop-down box. This object includes all properties related to your tile set.
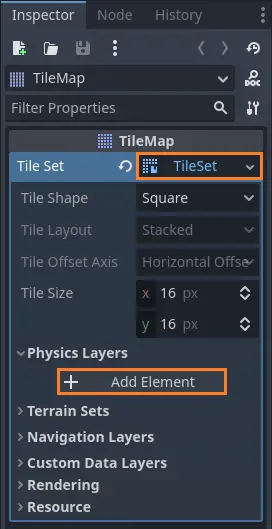
To open the ‘TileSet’ object in the box, click on it. Inside, you will see all the properties of the TileSet.
Expand the ‘Physics Layers’ and click the ‘Add Element’ button. This will enable the physics capabilities of the tile set.
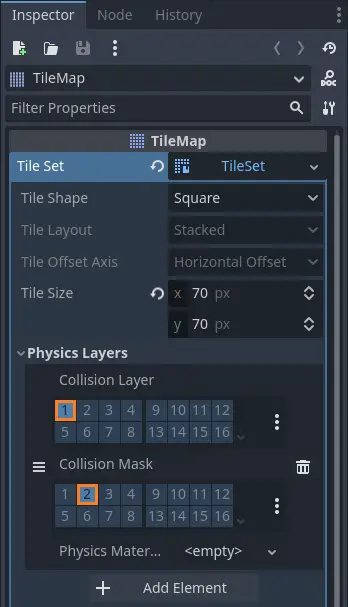
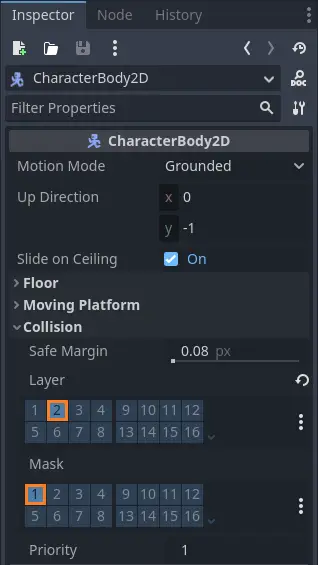
Step 2: Select a Collision Layer and Mask for the Tilemap
Once you have added the physics element, you will now have a bitmask of collision layers and collision masks.
The collision layer is the layer where your TileSet is found, while the collision mask is the target layer your Tilemap will interact with. The collision mask is usually set to be the player or other character layers.
You can also define names for each physics layer. To do that, go to the Project menu and open the Project Settings. In the ‘Layer Names’ section, you will find a ‘2D Physics’ tab that contains all 2D physics layer names.
There, you can define names for each of your layers. For example, layer 1, which corresponds to bit 1 in the inspector, can be the ‘World’ layer, and layer 2, which corresponds to bit 2, can be the ‘Player’ layer.
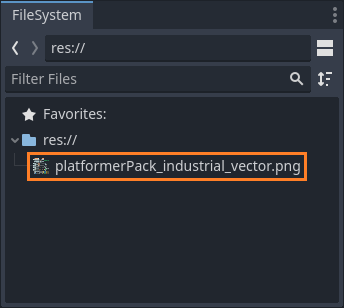
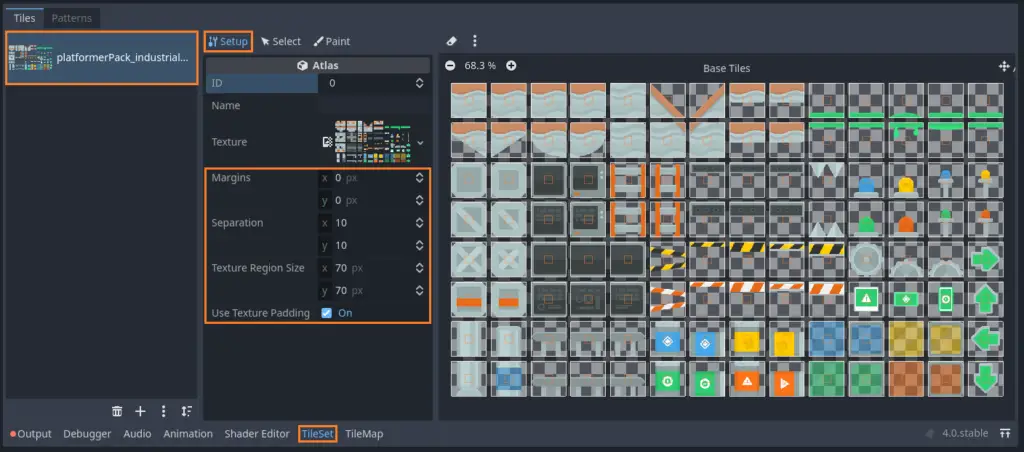
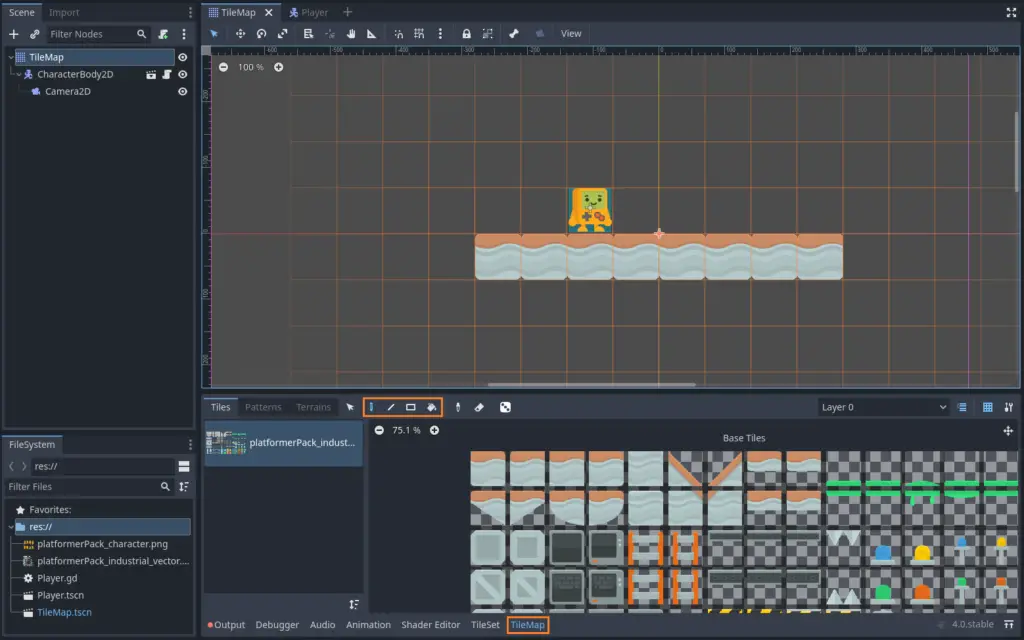
Step 3: Add an Image and Setup the Tileset
If you haven’t imported an image yet, you must have an image of the tile set in your project’s resource folder. To import an image, drag an image file into the FileSystem panel.
Once imported, open the TileSet editor by clicking the ‘TileSet’ button at the bottom of the screen. If you don’t see it, make sure the Tilemap node in the scene tree is selected.
Now drag the image from the resources list into the tiles list. You will receive a message asking if Godot should automatically map the tiles. Click ‘Yes’.
In the ‘Setup’ tab at the top of the TileSet editor, you have the tile set parameters. Adjust these parameters to define the exact dimensions of the tiles. Texture Region Size is the size of each tile. Separation is the number of pixels between each tile. And the Margins are the distances from the edges of the image.
Step 4: Create a Collision Shape for Each Tile in the Set
Go to the ‘Select’ tab at the top of the TileSet editor. There, you will see the properties of the tiles you select. Go ahead and select a tile to edit its collision shape. You can select multiple tiles to apply the same collision shape. This shape will be used by Godot for collision detection purposes.
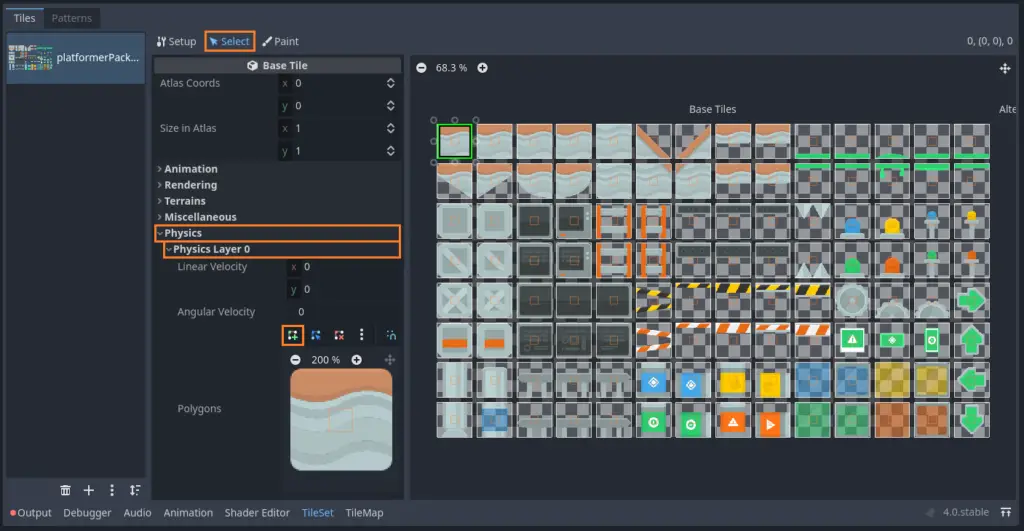
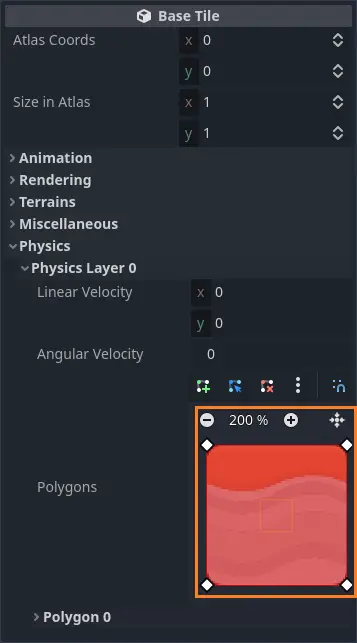
Once you have selected the tiles, open the ‘Physics’ property, and then expand ‘Physics Layer 0’. The buttons in the ‘Polygons’ section allow you to add, remove and edit the vertices of your collision shape. Click on the green button and then click on the tile image to start adding vertices.
You can zoom in/out with the plus/minus buttons. You can also move the vertices around on the image to align the shape to meet your requirements.
The 3 dots button give you more options to manipulate the shape you created. These options include: reset, clear, rotate and flip the collision shape.
Once you are done with the tile, you can move on to the next tile and set up its collision shape.
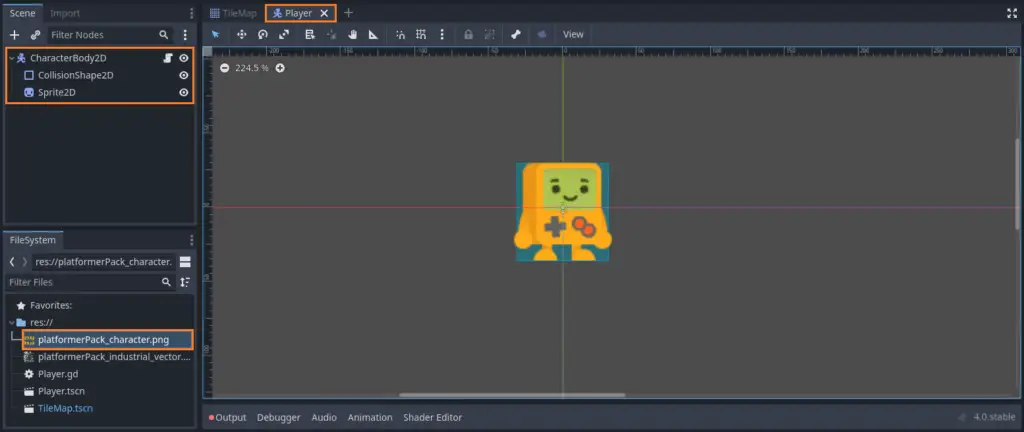
Step 5: Prepare the Colliding Character(s)
In order to make a character collide with the Tilemap, some work needs to be done on the character’s end. Firstly, ensure that your character node has a CollisionShape2D child node with a defined shape. This CollisionShape2D node will be used to detect the collision between the character and the world.
Make sure you have a camera attached to the character so that you can see it in the center of the screen. Additionally, you should add a script with basic character movement, including gravity. The gravity and movement will allow us to test the collision.
Step 6: Adjust the Collision Parameters of the Colliding Character(s)
Just like we did with the TileSet object, we need to define the physics collision layer and mask for the character. So, select your character and go to the inspector window.
In the ‘Collision’ section, you will see the same collision layer and mask blocks we saw in the TileSet object. Adjust the collision layer and mask to be the opposite of the Tilemap’s collision layer and mask.
In our previous example, we defined the world to be on layer 1 and the player to be on layer 2. This means that for the layer bit, we need to select bit 2. And for the mask bit, we need to select bit 1. This will tell Godot that the player is found on layer 2, while the collision target is layer 1, which is the world layer.
Step 7: Create the Level and Character(s)
Now all that is left to do is to draw the map, instantiate the player and run the game. To draw tiles, select one of the drawing methods using the buttons found at the top of the Tilemap editor (pencil, line, rectangle and bucket).
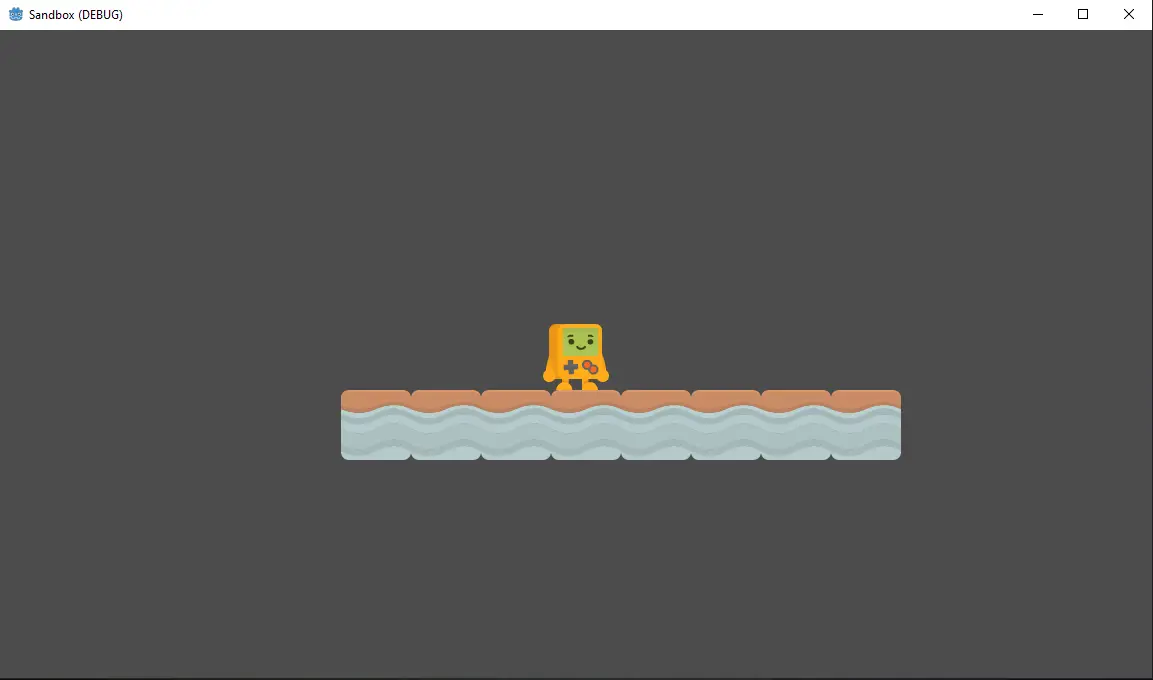
Step 8: Test the Game
Testing is important to verify everything works as expected. After completing all the steps above, your character should be colliding with the world you have built.
If this is not the case, review the steps again and make sure you have set all the properties correctly.
Still having trouble? feel free to leave a comment below, and I will do my best to assist you.
For more information on Tilemap nodes, go to the official Godot documentation at https://docs.godotengine.org/en/stable/tutorials/2d/using_tilemaps.html. And if you are interested in game development, you can read more in my blog at Night Quest Games Blog. See you there!
If the information in this article was helpful to you, please consider supporting this blog through a donation. Your contributions are greatly appreciated and allow me to continue maintaining and developing this blog. Thank you!


Plz describe how to set up one way collisions: its in TileSet/BaseTile/Physics/Polygon 0 after a collisionshape is defined super hard to find!