One of the main problems with developing isometric games is that you have to draw a 3D world using 2D assets like flat images. Essentially, you have to “fake” the depth of the world.
Unfortunately, this creates an unexpected problem, which is that the application doesn’t understand the correct drawing order of things that make the illusion of a 3D environment.
If the drawing order is incorrect, objects can disappear (be drawn behind other objects) or be partially visible (occluded by other objects which should be behind it).
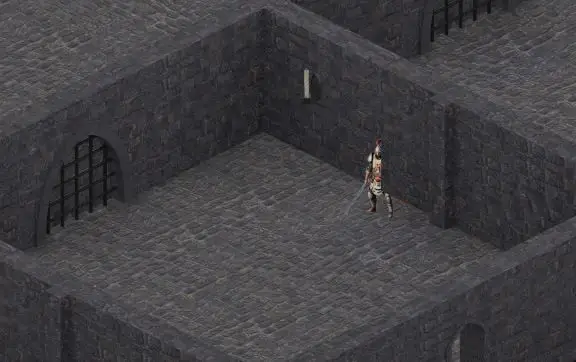
There is no easy solution to this problem since the 3D information doesn’t exist in the image assets. So, to overcome this issue, we must use our human understanding and perspective of the world, and several tools which Godot provides to deal with this problem.
If you are new to isometric Tilemaps in Godot, don’t worry, I’ve got you covered. Just read the Starting Out with Isometric Tilemaps in Godot article, and you will be good to go!
Understanding the Y-Sort Problem in an Isometric View
Godot’s coordinate system states that the Y-axis goes from top to bottom, meaning that the top of the scene corresponds to lower Y values, while the bottom corresponds to higher Y values. In an isometric view, the drawing order of objects should be based on their Y coordinate. So, according to this logic, objects should be drawn from low to high Y values, right? Well, that is partially correct.
Objects often have various shapes that make this problem more complicated. For example, a character should be drawn in front of a wall if his feet are below the base of the wall; otherwise, it should be drawn behind the wall. Examples like this one are everywhere in isometric maps. Anything that has a height or a non-symmetric shape might cause issues when drawn next to another object.
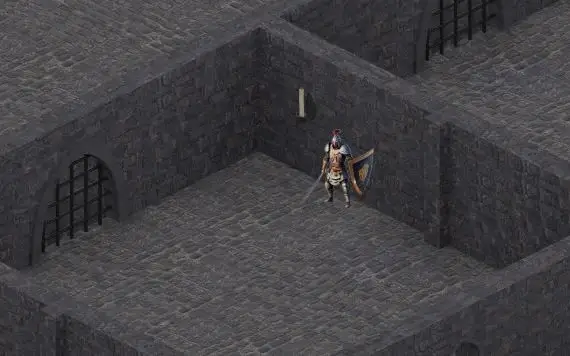
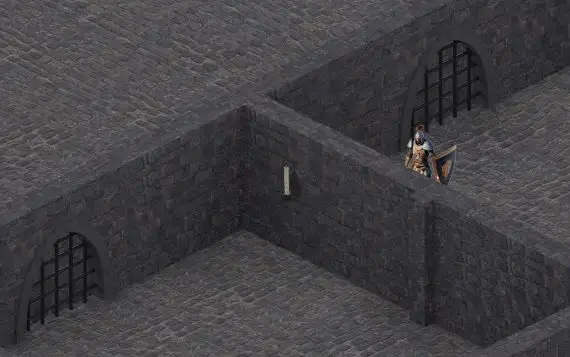
So how do you define the cut-off point? What is the optimal Y coordinate of each tile that will allow the application to dynamically choose the correct drawing order?
Changing the ‘Y Sort Origin’ Property of a Tile in a Tilemap Node
Each tile in a Tilemap node has a unique ‘Y Sort Origin’ property, which defines the Y coordinate used when the engine sorts the drawing order. The ‘Y Sort Origin’ property is not an absolute value but rather the offset from the texture origin.
How to Change the ‘Y Sort Origin’ Property of a Tile in a Tilemap Node
To change the ‘Y Sort Origin’ property, follow these steps:
- Open the ‘TileSet’ tab of your Tilemap node (bottom of the screen).
- Click on the ‘Select’ button at the top of the tab.
- Choose the tile you want to modify from the tiles section.
- Under the ‘Base Tile’ properties, open the ‘Rendering’ section.
- Change the ‘Y Sort Origin’ property to your needs.
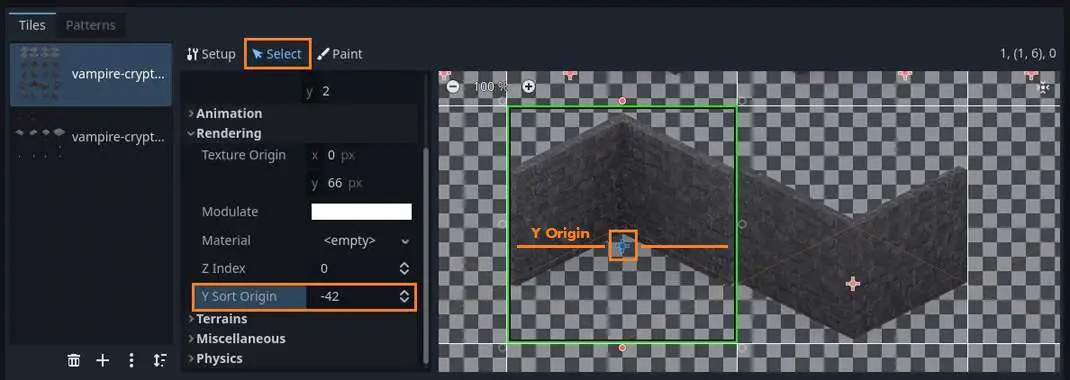
Where to Put the Y Origin of a Tile in a Tilemap Node
To create the illusion of 3D, we must define the Y cut-off point. If object A is found beneath object B on the map (higher Y value), object A will be rendered in front of object B (closer to the camera), and if object A is above object B (lower Y value), object A will be rendered behind object B (further from the camera).
This point should be marked on the object edge far from the camera. In the wall example, the Y sort origin should be defined on the corner of the wall farthest from the camera. If a character has a higher Y value than that corner, it means the character is standing in front of the wall; otherwise, the character is behind the wall. Keep in mind that the exact Y origin point will heavily depend on the shape and size of the object.
Y-Sorting Between a Tilemap Node and an Independant Scene
In most cases, you will need to add more scenes to interact with your Tilemap. To do that, you might want to adjust the Y coordinate of objects that are complete scenes themselves. In the previous example, we talked about a wall and a character. A character, in this case, is a good candidate for an independent scene. Note that in this case, you do not need to enable Y sorting on the scene, only on the Tilemap node and Tilemap layers.
How to Tell Godot to Compare Y Coordinate Values Between a Tilemap and a Scene
The way you can synchronize the Tilemap node and another scene is by making one of them a child of the other. In our example, the character node will be a child of the Tilemap node. This tells Godot to compare each tile in the Tilemap to the character scene’s Y coordinate and draw them in the intended order.
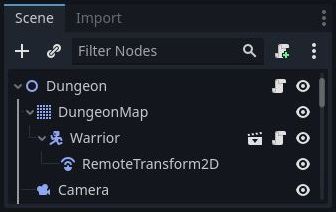
Adjusting the Y Coordinate of a Scene for Correct Y Sorting
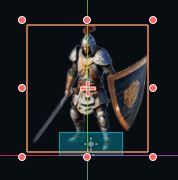
To adjust the Y coordinate of the character, simply change the transform (position) of the child nodes of the scene (sprites, colliders, etc.) relative to the root node position.
In the character scene image, you can see I moved the sprite and collider nodes to be above the root node anchor point (found in the scene center). This way, the Y sorting is always done relative to the characters feet.
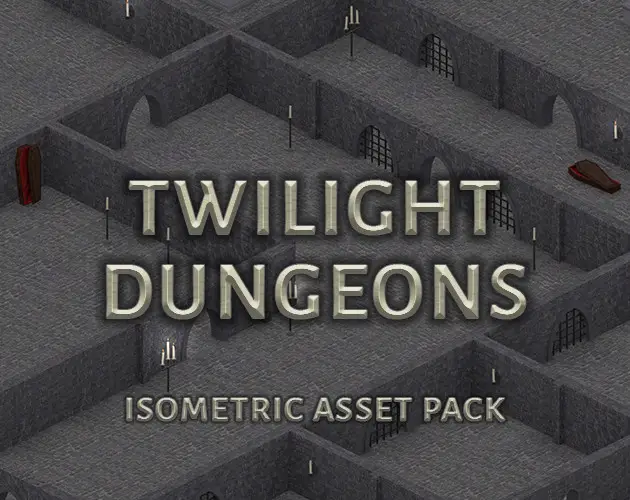
Twilight Dungeons Isometric Asset Pack
Do you like the dungeon scene I used in this article? It’s a high-resolution isometric asset pack I have created. You are welcome to download it and use it in your own games.
Fixing the Clipping Problem of the Far Side of an Object
If you followed this tutorial, you probably noticed that while it works fairly well on the side closer to the camera, it doesn’t work as well on the other side of the object. That’s because the drawing order is sorted based on a single Y value, while the object has depth and height. This issue is common among pure isometric games, even in AAA games.
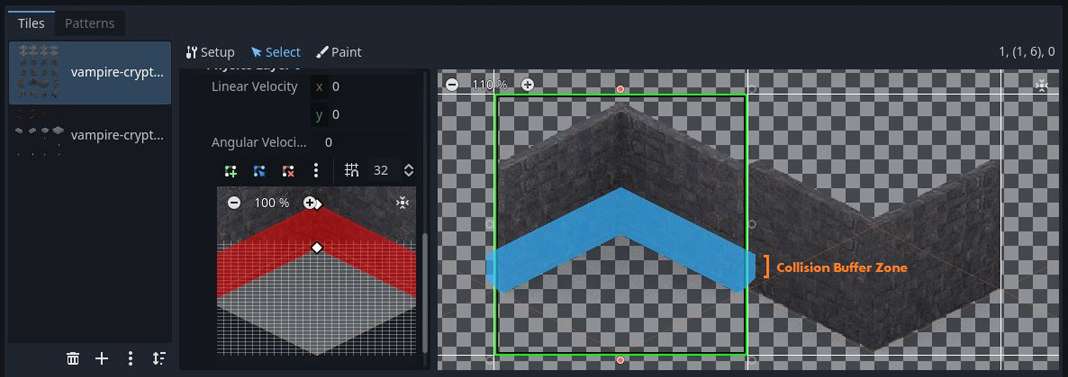
To overcome this issue, you need to leave a buffer zone between the objects, mostly on the back of the static object (the wall in the previous example). This buffer zone ensures that the incorrect drawing order will not happen because the application does not allow the objects to be that close to each other.
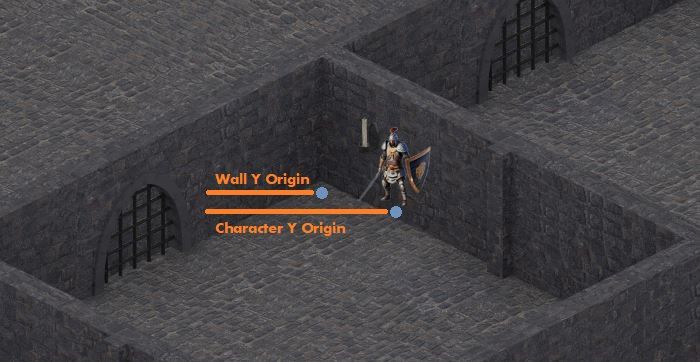
A character may stand in front of an object close to it but might have a larger distance in the back due to the buffer zone. To implement this in the wall and character example, all you need to do is make the collision area of the wall larger in the back. This way, the character will never be in a position where it’s clipping through the static object.
My Take on Y-Sorting and Isometric Tilemaps in Godot
I personally love isometric games; I played many of them growing up. Unfortunately, developing an isometric game is quite a headache. There are many challenges with graphics in 2D isometric environments, such as collision, drawing order, and lighting.
To make a good isometric game, like an RPG, you have to know how to deal with all those issues. Plus, creating tilesets, aligning all tiles, defining collision shapes, and Y origins is a massive amount of work! Regarding the Y sorting problem, it’s just another thing you have to know, and once you learn it, it’s not an issue anymore.
If you want to know more about Godot and game development, I have a lot of articles on the Night Quest Games Blog. I promise you won’t be disappointed. Good luck!
If the information in this article was helpful to you, please consider supporting this blog through a donation. Your contributions are greatly appreciated and allow me to continue maintaining and developing this blog. Thank you!

Hey, good guide, very helpful for beginners! I wonder if you managed to solve similar problem for larger objects on the map. By larger I mean objects that can take more than one tile (a looong table, for example).