Animation could be categorized into several buckets. The two types of animation we are going to discuss in this article are Frame-Based Animation and Keyframing Animation. Godot also provides Bone Animation capabilities, but these are advanced animation techniques which will not be discussed here.
Frame-based animation is the most basic form of animation, comprised of a sequence of individual images that define each frame and form the motion you see in the animation. Keyframing animation takes an object and transforms its properties over time, based on predefined keyframes on a timeline.
Godot provides two nodes that implement these two types of animation: the AnimatedSprite2D node and the AnimationPlayer node. Let’s talk about each of them and see how you can use them to easily create animations in your Godot projects.
Animating Using the AnimatedSprite2D Node in Godot
The AnimatedSprite2D node gives you the ability to create frame-based animations from individual images or sprite-sheet files.
When using individual images as the basis for the animation, all images must be loaded into Godot and then organized in the Animation tab into a sequence. If you are using sprite sheets as the source of your animations, then all sprites in the sprite sheet file must be organized in a grid so that Godot can slice it and create a sequence of sprites with the correct sizes.
No matter which way you choose, you can create multiple sequences from different images. The order of sprites is up to you to decide. You should also change the FPS setting to match the speed of your animation and your visual preferences. The animation control is done by referring to the AnimatedSprite2D node from the script.
You are probably wondering what the difference is between using individual images and using a sprite sheet for your animation. Well, each of these techniques has its own set of benefits and drawbacks. Let’s discuss some of them.
Individual Images vs. Sprite Sheets: When Should You Use Each?
Individual frame images should be used in the following situations:
- Very high image quality: Animations with high image quality may not fit into a single sprite sheet image. For example, a 512×512 sprite with 24 frames would require a sprite sheet size of 3072×2048, which is a very high resolution for a single file. Working with such large image files could significantly slow down Godot.
- Non-grid image shape: Sometimes animations have irregular shapes that don’t conform to the predefined nature of a sprite sheet’s grid. For instance, an object transitioning from a flat pancake shape to a tall lamppost shape would pose challenges with sprite sheets because the bounding box size changes dramatically from frame to frame. While you could define very large sprite sizes to accommodate this, it would result in a very high-resolution file that Godot may struggle to handle.
- Time/resources constraints: If you lack the time or resources to convert all your individual images to sprite sheets, you may have to use individual frame images.
In any other situation not mentioned, you should probably use sprite sheets. Generally, it’s more efficient for your game’s performance to use sprite sheets because it’s easier for a GPU to render animations from a single image rather than from multiple images.
Adding Frames From Image Files Into the AnimatedSprite2D Node
Here are the steps to add frames from individual files, where each image contains one frame in the animation sequence:
- Import all frame images into a folder in your project’s file system.
- Click on your AnimatedSprite2D node and create a new SpriteFrames object (Inspector -> Animation -> Sprite Frames -> New SpriteFrames).
- Click on the SpriteFrames tab at the bottom of the Godot editor.
- Click the ‘Add Animation’ button at the top of the tab window and rename the animation.
- Drag and drop all image files from your project’s file system to the empty ‘Animation Frames’ space in the Animation tab (or click the ‘add frame from file’ button and select the required files).
Adding Frames From a Sprite Sheet Into the AnimatedSprite2D Node
Adding frames from a sprite sheet file is very similar to adding image files. To add a sprite sheet, follow these steps:
- Import the sprite sheet file into your project’s file system.
- Click on your AnimatedSprite2D node and create a new SpriteFrames object (Inspector -> Animation -> Sprite Frames -> New SpriteFrames).
- Click on the SpriteFrames tab at the bottom of the Godot editor.
- Click the ‘Add Animation’ button at the top of the tab window and rename the animation.
- Click the ‘Add frames from sprite sheet’ button and select the sprite sheet file.
- In the opened window, slice the sprite sheet by adjusting the grid parameters on the right.
- Select the sequence of frames by clicking on each file in the grid and finally click the ‘Add X Frame(s)’ button. The selection order will be the frame playing order.
Customizing Your Animation in the AnimatedSprite2D Node
From here, you can change the frame order, frame duration, number of frames per second you wish to play, and finally test your animation sequence to see what it looks like by clicking the ‘Play’ button at the top of the Animation tab.
Implementing a Script That Controls the Playback of the AnimatedSprite2D Node
In the following script, you will see an example implementation of animation playback control following user input. The script also keeps track of the current state of the animation and uses the animation_finished signal to avoid jumps in the animation.
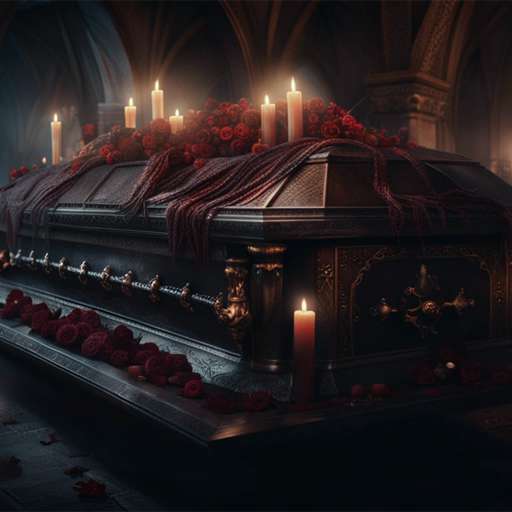
The ‘VampireCoffin_Open’ and ‘VampireCoffin_Close’ actions were defined in the input map of the project. And the ‘Open’ animation was defined in the SpriteFrames object.
extends AnimatedSprite2D
class_name VampireCoffinAnimation

# Enumeration of the vampire coffin states
enum VampireCoffinState { Closed, Open }

# Reference to the AnimationPlayer node
@onready var m_NodeAnimationPlayer : AnimationPlayer = get_node("AnimationPlayer")

# Current state of the vampire coffin
var m_CurrentState : VampireCoffinState = VampireCoffinState.Closed

# Initialize the vampire coffin animation
func _ready() -> void:
	# Connect the 'animation_finished' signal to a local method
	animation_finished.connect(_OnAnimationFinished)

# User input handler
func _input(_event : InputEvent):
	match (m_CurrentState):

		VampireCoffinState.Closed:
			if (Input.is_action_just_pressed("VampireCoffin_Open")):
				# Transition vampire coffin from a closed state to an open state
				play("Open")

		VampireCoffinState.Open:
			if (Input.is_action_just_pressed("VampireCoffin_Close")):
				# Transition vampire coffin from an open state to a closed state
				play_backwards("Open")

# Callback method for the 'animation_finished' signal
func _OnAnimationFinished() -> void:
	# Switch the current state of the vampire coffin
	m_CurrentState = VampireCoffinState.Open if (m_CurrentState == VampireCoffinState.Closed) else VampireCoffinState.Closed
Animating Using the AnimationPlayer Node in Godot
The AnimationPlayer node is a robust mechanism that lets you change properties of other nodes over time. This is very similar to using Tweens in Godot, except it’s built into the editor. For example, you can change the zoom setting on the scene’s camera and create various effects like slow zoom in/out, extreme object close-up, and far-away views of the world. Any property of a node can be changed by the AnimationPlayer node.
Creating a New Animation in the AnimationPlayer Node
How do you set up the AnimationPlayer node and create a new animation, you ask? Well, it’s quite easy:
- Click the AnimationPlayer node and define the root node (Inspector -> AnimationPlayer -> Root Node). All nodes (including the root) under the selected node will have the option to keyframe any property in the animation player’s timeline.
- Open the ‘Animation’ tab at the bottom of the Godot editor.
- Click the ‘Animation’ button at the top of the tab window and select ‘New’.
- Give the new animation a name that will represent its functionality.
- Modify the Seconds/FPS parameter at the bottom of the tab to your requirements.
Setting Keyframes in the AnimationPlayer Node’s Timeline
Now that you have the player and animation set up, it’s time to set some keyframes to create the animation. Keyframes are checkpoints on the timeline that have defined property values. All property values between the keyframes will transition from the initial value to the final value of the property.
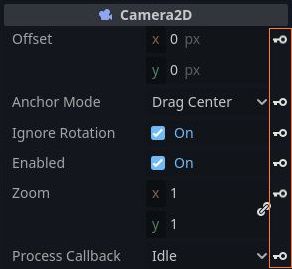
In the camera zoom-in example, the ‘Zoom’ property of the camera will be keyframed with a value of 1.0 on the first frame and then keyframed with a value of 1.2 in the last frame. The camera zoom numbers here are completely arbitrary, and you can change them to your needs if you are following this example. The speed of the animation will depend on the duration of the animation.

To add a property to the animation player’s timeline, here is what you need to do:
- Open the ‘Animation’ tab at the bottom of the Godot editor.
- On the player’s timeline, click on the frame/time where you want to set your keyframe.
- Select the target node and click the small key icon next to the required property in the Inspector panel.
- A small diamond shape should appear on the timeline, representing the keyframe.
Adjusting the Parameters of the Animation Track
Once you have set up all keyframes and have the animation track ready, you can experiment with the different parameters of the track. The parameters are found on the right side of the track (Update Mode / Interpolation Mode / Loop Wrap Mode).
You can also change the value and the easing of each keyframe by clicking on an individual keyframe and checking the Inspector panel.

Implementing a Script That Controls the Playback of the AnimationPlayer Node
This is the same script as in the AnimatedSprite2D example, with a small addition. When the application detects user input, in addition to the opening and closing of the coffin, the camera will also zoom in and out, depending on the state of the coffin. In this scene, The Camera2D and AnimationPlayer nodes are children of the AnimatedSprite2D node.
extends AnimatedSprite2D
class_name VampireCoffinAnimation

# Enumeration of the vampire coffin states
enum VampireCoffinState { Closed, Open }

# Reference to the AnimationPlayer node
@onready var m_NodeAnimationPlayer : AnimationPlayer = get_node("AnimationPlayer")

# Current state of the vampire coffin
var m_CurrentState : VampireCoffinState = VampireCoffinState.Closed

# Initialize the vampire coffin animation
func _ready() -> void:
	# Connect the 'animation_finished' signal to a local method
	animation_finished.connect(_OnAnimationFinished)

# User input handler
func _input(_event : InputEvent):
	match (m_CurrentState):

		VampireCoffinState.Closed:
			if (Input.is_action_just_pressed("VampireCoffin_Open")):
				# Transition vampire coffin from a closed state to an open state and zoom in
				play("Open")
				m_NodeAnimationPlayer.play("CameraZoomIn")

		VampireCoffinState.Open:
			if (Input.is_action_just_pressed("VampireCoffin_Close")):
				# Transition vampire coffin from an open state to a closed state and zoom out
				play_backwards("Open")
				m_NodeAnimationPlayer.play_backwards("CameraZoomIn")

# Callback method for the 'animation_finished' signal
func _OnAnimationFinished() -> void:
	# Switch the current state of the vampire coffin
	m_CurrentState = VampireCoffinState.Open if (m_CurrentState == VampireCoffinState.Closed) else VampireCoffinState.Closed
Skull and Bones
Enter the perilous world of skull and bones, where you play by your own rules to rise from a nobody to become the most fearsome pirate kingpin. skull and bones is on ubisoft connect, epic games, playstation 5, xbox series x|s, and luna.
My Take on Animation Nodes in Godot
Animation is very important in games since it brings the game to life and gives the player the gaming experience they expect. Godot provides a good amount of functionality when it comes to animation, from basic frame-by-frame animation to complex 2D and 3D Bone Animation techniques.
Learning how to create basic animations in Godot is fairly easy using the nodes we talked about in this article. However, mastering advanced animation features like 2D and 3D skeletons and character rigging might take you a bit longer.
The official Godot documentation also provides a nice introduction to animation, which you can read here: https://docs.godotengine.org/en/stable/tutorials/animation/introduction.html. Additionally, if you need more game development guidance, there are many articles in the Night Quest Games Blog that will help you on your path to greatness. See you there!
If the information in this article was helpful to you, please consider supporting this blog through a donation. Your contributions are greatly appreciated and allow me to continue maintaining and developing this blog. Thank you!


