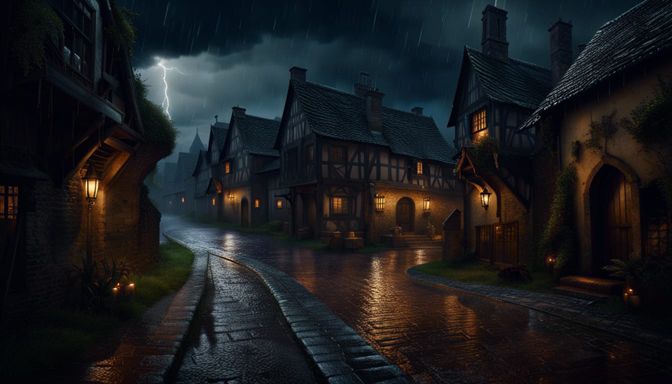
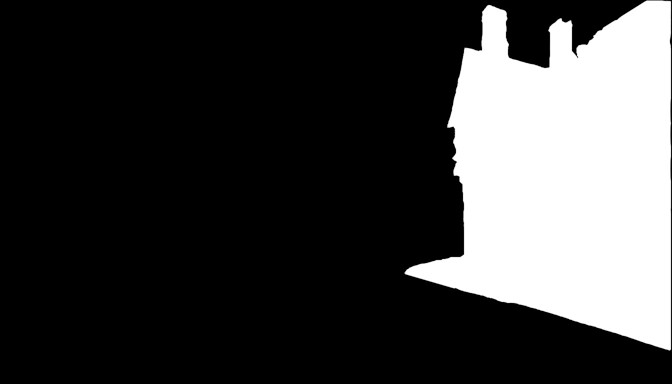
A mask image is a black-and-white image that contains the area of a specific object in another image. A texture mask is useful for outlining or highlighting an object within an image. It can also be used for applying visual effects to the desired area. In some cases, it is used for pixel-perfect collision detection.
The goal of this article is to show you how you can use texture masks to isolate specific objects in an image and apply effects to the object’s area. So come with me on a journey to discover the incredible world of shader visual effects!
The Basics of Shaders in Godot
A shader is a small program that runs on the GPU, unlike graphics computations performed on the CPU. This program is written by the developer and instructs the GPU on processing all information received from the CPU – handling tasks such as processing vertices, creating shapes, coloring each pixel, and more. Processing all visual information on the GPU significantly improves the game’s performance, as the GPU is optimized for managing small operations simultaneously.
Godot allows you to create these small programs and modify how a texture is processed on the GPU. Each shader program is then attached to a sprite node, such as Sprite2D, and automatically applied during game runtime. The shader language differs from GDScript and is similar to the C language. You can learn how to create shaders and attach them to nodes in The Magic Behind Shader Programming in Godot 4.
Let’s begin by creating a shader program that will accept a mask image and display only the area on the target texture where the mask contains white pixels.
Applying a Mask to an Image Using a Shader
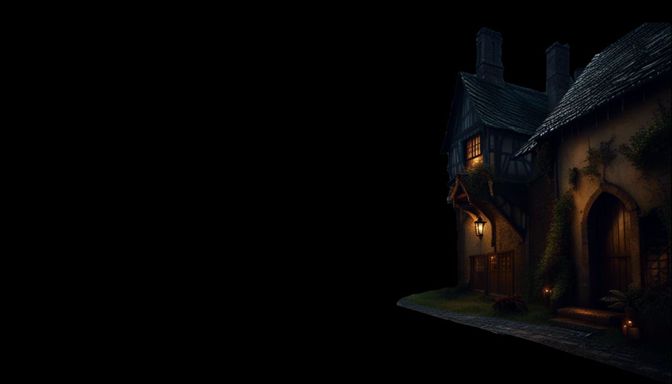
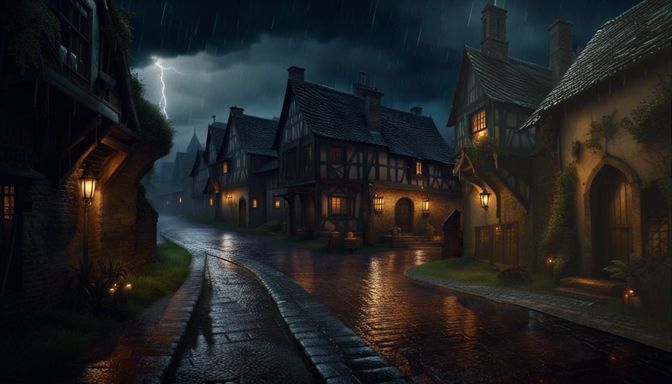
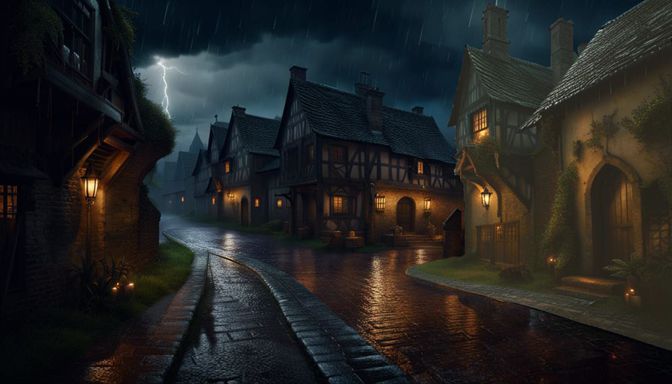
Here are the original image, the mask and the output of the shader we are going to write.
shader_type canvas_item;

uniform sampler2D maskImage;										// Mask Image

void fragment() {
	vec4 maskImageColor = texture(maskImage, UV);

	// Caluclate the brightness of the pixel in the mask image
	float maskImageBrightness = (maskImageColor.r + maskImageColor.g + maskImageColor.b) / 3.0;

	// Show only the white area on the target texture
	COLOR.a = maskImageBrightness;
}
Note that this shader doesn’t actually distinguish between black and white pixels; it simply assigns the brightness of the color to the alpha channel of the target image. Therefore, if there are some shades of gray in the mask, you may still see parts of the target image where those gray pixels are present on the mask.
For a 2D shader in Godot, we must define the shader as a canvas_item type. The uniform used in this shader is the maskImage uniform. The mask image is a black-and-white image that defines the area to be shown or to which visual effects should be applied.
The first step of the shader is to calculate the brightness of each fragment by averaging the RGB channels. The mask image brightness is the exact value of the alpha channel of the target texture. That’s it! Simple huh?
The masking works well, but I want to add one more effect to make this shader even more versatile. I want to control the alpha channel of the black area, allowing me to make it partially transparent without completely removing it. To achieve this, we need to adjust the dim level applied to the alpha channel of each pixel in the image.
shader_type canvas_item;

uniform float dimLevel : hint_range(0.0, 1.0) = 0.0;				// Alpha level of area outside the mask
uniform sampler2D maskImage;										// Mask Image

void fragment() {
	vec4 maskImageColor = texture(maskImage, UV);

	// Caluclate the brightness of the pixel in the mask image
	float maskImageBrightness = (maskImageColor.r + maskImageColor.g + maskImageColor.b) / 3.0;

	// Show only the white area on the target texture and dim the rest
	COLOR.a = min(dimLevel + maskImageBrightness, 1.0);
}
The additional uniform introduced in this shader variation is the dimLevel uniform, which represents the alpha channel value for each fragment within the black area.
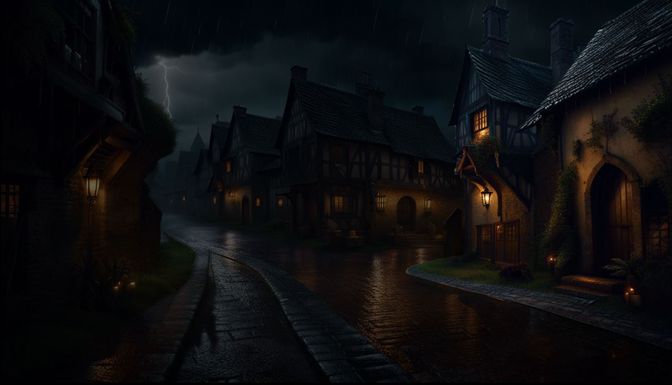
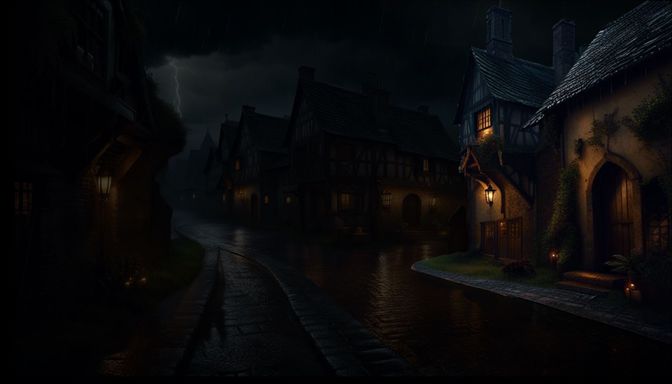
You can see from the images that lower values will make the background mix with the back color, which in this case is pure black. A value of 1.0 will not dim the background and will look the same as the original image.
Adding a Color Tint to the Target Area
At times, you may want to apply a color tint to the area on the target texture. To achieve this, you’ll need to introduce new uniforms that represent the tint and brightness of the desired color. Next, multiply the base tint color by the tint brightness factor and add the resulting color to the RGB channels of the image.
shader_type canvas_item;

uniform vec3 tintColor : source_color;								// Base tint color
uniform float tintBrightness : hint_range(0.0, 1.0) = 0.2;			// Brightness of the tint color
uniform sampler2D maskImage;										// Mask Image

void fragment() {
	vec4 maskImageColor = texture(maskImage, UV);

	// Caluclate the brightness of the pixel in the mask image
	float maskImageBrightness = (maskImageColor.r + maskImageColor.g + maskImageColor.b) / 3.0;

	// Change the color of the white area on the target texture
	COLOR.rgb += maskImageBrightness * tintColor * tintBrightness;
}
The new uniforms used in this shader are:
tintColor: Base color of the tint you want to apply.tintBrightness: Multiplier of the base tint color. Causes the base color to be more dominant.
So far we talked about static changes to the target texture. Now it’s time to move on to a dynamic visual effect that changes over time.
Creating a Glow Effect Over the Target Area
The last effect I want to make is a flashing inner glow on the white area of the mask. This effect adds beauty, serves well for marking objects, directing a player’s focus, or simply improving visual appeal.
Implementing this effect isn’t difficult; it just requires some mathematical knowledge and a bit of trial and error. Take a look at the closest house in the video.
shader_type canvas_item;

uniform float frequency : hint_range(0.0, 10.0) = 2.0;			    // Rate of glow change
uniform float brightnessRange : hint_range(0.0, 1.0) = 0.05;		// Range of brightness change
uniform float brightnessOffset : hint_range(-0.1, 0.1) = -0.05;		// Offset of brightness from center
uniform sampler2D maskImage;										// Mask Image

void fragment() {
	vec4 maskImageColor = texture(maskImage, UV);

	// Caluclate the brightness of the pixel in the mask image
	float maskImageBrightness = (maskImageColor.r + maskImageColor.g + maskImageColor.b) / 3.0;

	// Glowing white area in the mask
	COLOR.rgb += maskImageBrightness * (brightnessRange * sin(frequency * TIME) + brightnessOffset);
}
The glow effect is achieved by cyclically increasing and decreasing the brightness of the target area over time. This cyclic change of brightness relies on establishing a dependency between the target texture color and the sine function. Several uniforms have been defined to control this effect:
frequency: Determines the rate of flashing of the target area. Lower values result in slower flashing, while higher values intensify the flashing speed.brightnessRange: Specifies the range of brightness for the glow. Typically, you wouldn’t want the glow to oscillate between pitch black and pure white. Use this uniform to limit the brightness range. A lower value narrows the range, while a higher value widens it. The exact value will depend on the image used, the masked area and your visual preferences.brightnessOffset: Sets the brightness offset from the center. Lower values darken the flashing, while higher values make it brighter.
Combining All Code Into a Single Shader
Most of the time, it’s more efficient to combine shaders into a single, larger one rather than switching between them at runtime. That’s why I’ll combine all three shaders we’ve implemented into a single shader program.
shader_type canvas_item;

uniform float frequency : hint_range(0.0, 10.0) = 2.0;			    // Rate of glow change
uniform float dimLevel : hint_range(0.0, 1.0) = 0.0;				// Alpha level of area outside the mask
uniform float brightnessRange : hint_range(0.0, 1.0) = 0.05;		// Range of brightness change
uniform float brightnessOffset : hint_range(-0.1, 0.1) = -0.05;		// Offset of brightness from center
uniform vec3 tintColor : source_color;								// Base tint color
uniform float tintBrightness : hint_range(0.0, 1.0) = 0.2;			// Brightness of the tint color
uniform sampler2D maskImage;										// Mask Image

void fragment() {
	vec4 maskImageColor = texture(maskImage, UV);

	// Caluclate the brightness of the pixel in the mask image
	float maskImageBrightness = (maskImageColor.r + maskImageColor.g + maskImageColor.b) / 3.0;

	// Show only the white area on the target texture and dim the rest
	COLOR.a = min(dimLevel + maskImageBrightness, 1.0);

	// Combined shader of inner glow and color tint
	COLOR.rgb += maskImageBrightness * (brightnessRange * sin(frequency * TIME) + brightnessOffset) * tintColor * tintBrightness;
}
Conclusion
If you’ve reached this far, you’re awesome! Shaders are among the most powerful tools a game developer has in their arsenal. You are well on your way to greatness!
I suggest copying the complete shader into your project and experimenting with the uniforms to understand their impact on the image. This shader is also posted on the amazing Godot Shaders website, you should check out all the cool shaders posted there, specifically for Godot!
If you need further guidance in game development, there are many more articles available on the Night Quest Games Blog. Good luck!
If the information in this article was helpful to you, please consider supporting this blog through a donation. Your contributions are greatly appreciated and allow me to continue maintaining and developing this blog. Thank you!


