Music and sound effects are crucial components of a video game, as they can make or break the player’s experience. Adding music and sound to your games is not an easy task, and there are many pitfalls along the way.
In order to make it easier for you to develop games that have rich music and sounds, you must have a robust audio system.
In this article, I want to build a simple yet robust audio system that will allow you not only to have playback control but also to have a framework for organizing the audio in the game and controlling it through Godot’s audio buses system.
This does not mean it will be able to do everything you want, but it’s a good start for most small to medium games. Let’s start by analyzing the requirements of such a system.
Defining the Audio System Requirements
As with every software module you add to your games, you must ask yourself: what are the requirements for the system you are trying to build? After all, the software requirements are what eventually define the functionality of the system. So, don’t skip this step and define the exact requirements for the audio system of your game.
As an example, I designed a general audio system that will work for most simple games. For larger and more complex games, additional functionality will probably be needed. Here are the requirements for the system I designed:
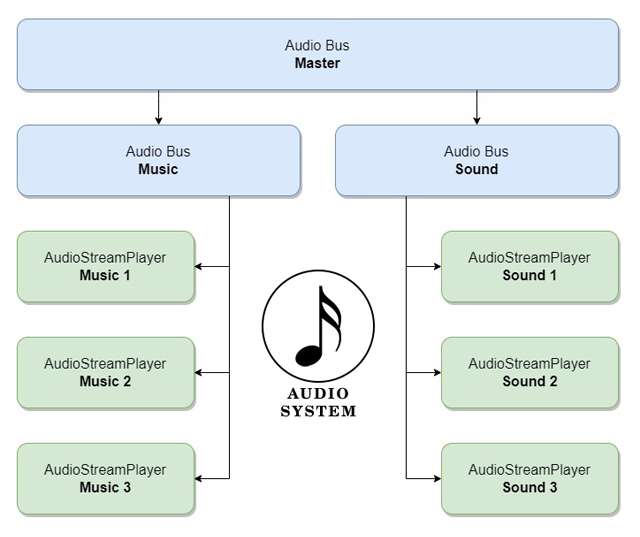
- The audio system should be divided into two separate buses: a Music bus and a Sound bus. The ‘Music’ bus plays all background music tracks, and the ‘Sound’ bus is responsible for playing all sound effects in the game.
- Several sound effects can be played in parallel. For example, the sounds of the player should mix with the sounds of the enemies and the world. There is no hard limitation on the number of sounds that can be played in parallel.
- Similar sound effects can be grouped and played interchangeably. For example, a sword swing can have several different sounds that can be played randomly when the player swings the sword multiple times.
- Support for custom bus audio effects. For example, fade-in and fade-out effects applied on a single audio bus.
- Support real-time audio modifiers (built-in audio bus effects). The developer should be able to apply Godot’s built-in sound effects, based on the state of the game.
- All scenes and scripts in the audio system must be transferable to other projects. All scenes and scripts implemented for this audio system must be completely generic, transferable, and work out-of-the-box in other projects.
Designing the Audio System’s Architecture
To satisfy the system’s requirements, you must create several classes and establish clear rules about how audio is played in the game. Each of the following sections explains how to meet the corresponding system requirement.
1. Defining the Music and Sound Buses in the Audio Layout
Godot’s Audio Bus Layout allows you to categorize the audio clips in your game into groups. A group of audio clips is called an audio ‘Bus,’ which contains the group’s name, volume level, audio effects, and other information. Each audio bus can be accessed and modified using its index in the bus layout list, implemented internally by the Godot engine.
Each AudioStreamPlayer node is assigned to a specific audio bus. When an audio bus’ parameters change, all AudioStreamPlayer nodes associated with that bus are updated. The default bus assigned to a new AudioStreamPlayer node is the ‘Master’ audio bus.
The ‘Master’ bus is the foundation for all audio in your project, meaning that any changes made to it will affect every single AudioStreamPlayer node.
Every new audio bus added to the layout is linked to a parent bus, forming a tree of audio buses. Additionally, each time you create a new AudioStreamPlayer node, you need to assign the correct audio bus.
In my audio system, I created the ‘Music’ audio bus and the ‘Sound’ audio bus, both of which are linked back to the ‘Master’ audio bus. All sound effects in my game will be assigned to the ‘Sound’ bus and controlled by it, while all the music tracks will be assigned to the ‘Music’ bus.
2. Specifying General Rules for Playing Music and Sound
One of the most notable principles of object-oriented programming (OOP) is the Encapsulation principle. This principle states that an object should privately contain the information and functionality related to it inside the object itself, while providing an external interface for that functionality to other objects.
In my audio system’s architecture, I use the encapsulation principle to ensure that every object in the game contains its own audio assets and functionality. This ensures that I can play any number of sounds simultaneously.
Example: Every Object Contains it’s Own Audio Stream Players
The player should contain all audio stream players related to it. When the player character is running, the Player class is responsible for playing and stopping the ‘Run’ sound. When the player takes a hit, it should play the ‘Hit’ sound. This holds true for the enemies, the world, the objects in the world, or any other element you have in the game that has audio.
3. Playing Similar Sounds Using the AudioCollection Scene
An audio collection is a group of similar sounds that can be played either sequentially or randomly. Footsteps on different surfaces, such as the ground or grass, provide a good example of several footstep sounds that can be played randomly.
An ‘AudioCollection’ scene can be instantiated in every scene that requires audio. Under the AudioCollection node, you must add at least one AudioStreamPlayer. During playback, the AudioCollection node will use the streams assigned as its children to play the sounds. The AudioCollection node will have the following methods and variables:
PlaybackOrder: An exported enum variable that allows you to choose between ‘Sequential’ or ‘Random’ playback order.Play(): Starts the audio collection playback. The order of the audio clips will depend on thePlaybackOrdervariable.Stop(): Stops the audio collection playback.
The AudioManager Scene: Support for Custom Bus Audio Effects
The AudioManager scene is an Autoloaded singleton that manages bus volume levels, built-in bus audio effects, and custom audio effects. For volume control and custom audio effects, the AudioManager script will implement the following methods:
GetVolume(busIndex: int): Returns the volume level of an audio bus as a float (0.0 – 1.0).SetVolume(busIndex: int, volume: int): Sets the volume level (0.0 – 1.0) of the requested bus.GetBusCount(): Returns the number of active audio buses.EffectFadeIn(busIndex: int, duration: float): Performs a fade-in effect on the requested bus.EffectFadeOut(busIndex: int, duration: float): Performs a fade-out effect on the requested bus.
Important: The Logarithmic Scale of Audio
Audio volume levels are expressed in units called ‘decibels’ (dB), which are measured using a logarithmic scale. If you want to have a simple interface as described, using percentages instead of decibels, you must have a conversion function from decibels to a percentage and vice versa. To perform the conversions, Godot has the db_to_linear(db: float) and linear_to_db(lin: float) functions.
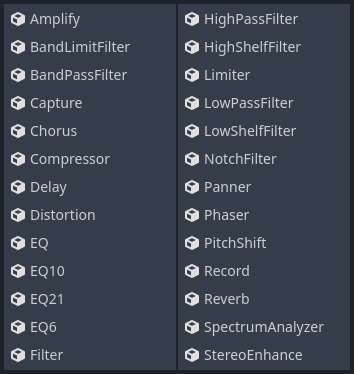
5. The AudioManager Scene: Support Real-Time Audio Modifiers (Built-in Audio Effects)
The AudioManager scene should also be able to apply Godot’s built-in audio effects to a specific bus. To accomplish this, the AudioManager script will implement the following methods:
AddBusEffect(busIndex: int, effect: AudioEffect): Adds an audio effect to a specific bus. Returns the index of the new effect.RemoveBusEffect(busIndex: int, effectIndex: int): Removes an audio effect from a specific bus.ToggleBusEffect(busIndex: int, effectIndex: int, enable: bool): Enables or disables an existing effect on a specific audio bus.IsBusEffectEnabled(busIndex: int, effectIndex: int): Returns true if the effect at the given bus and index is enabled, and false otherwise.
6. AudioCollection and AudioManager Scenes Should Be Transferrable to Other Projects
The architecture of this audio system allows the AudioCollection and AudioManager scenes to be completely generic and 100% transferrable to other projects without any modifications. This reflects my long-term thinking. When starting a new project, I aim to avoid wasting time implementing basic systems that I have previously created. In this case, I can simply copy the audio system scenes and scripts and paste them into the new project. Done!
Of course, games vary in their audio requirements, and I might need to make some minor adjustments to accommodate the new needs of the project. But for the most part, this is a universal system that I can use in any of my projects, and so can you!
Implementation of the Audio System in GDScript
The implementation of the audio system consists of 3 steps: defining the audio bus layout in the Godot editor, implementing the AudioCollection scene and implementing the AudioManager scene.
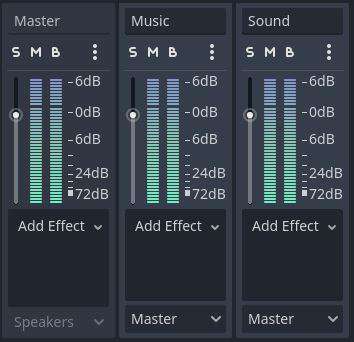
Creating the Audio Bus Layout in the Audio Tab
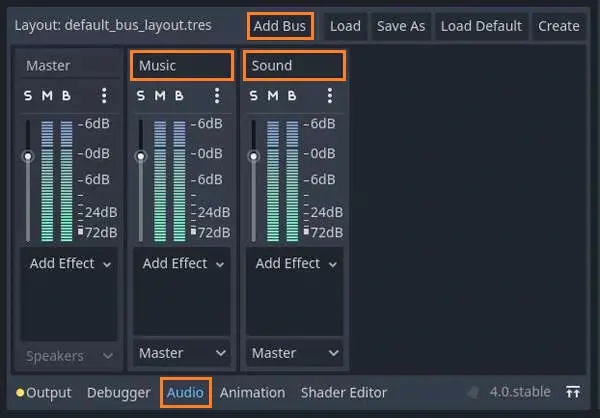
Here are the steps to add the additional audio buses to the layout:
- Open the ‘Audio’ tab at the bottom of the screen.
- Click the ‘Add Bus’ button at the top of the tab. You will see a new audio bus appear in the main view of the tab.
- Give the new bus an appropriate name.
- Ensure that the parent audio bus is set to ‘Master’ (choice box at the bottom of the audio bus).
Now, let’s add the two buses we defined earlier: the ‘Music’ bus and the ‘Sound’ bus.
Implementing the AudioCollection Class in GDScript
Start by creating an ‘AudioCollection’ scene and script. Next, define the script’s variables, enums, constants, and objects.
@tool

extends Node
class_name AudioCollection

# Enum for defining the audio playback order
enum AudioPlaybackOrder { Sequential, Random }

# Playback order of the audio collection
@export var PlaybackOrder : AudioPlaybackOrder = AudioPlaybackOrder.Sequential

# Default value for the current stream player index
const NO_STREAM_PLAYER : int = -1

# The current audio stream player index
var m_CurrentPlayerIndex : int = NO_STREAM_PLAYER

# Random number generator object
var random = RandomNumberGenerator.new()
Now, you need to implement all the public methods we discussed in previous sections.
# Start the audio collection playback
func Play() -> void:
	if (PlaybackOrder == AudioPlaybackOrder.Sequential):
		# Set the current player index to the next audio clip
		m_CurrentPlayerIndex = (m_CurrentPlayerIndex + 1) % get_child_count()

	elif (PlaybackOrder == AudioPlaybackOrder.Random):
		# Set the current player index to a random audio clip
		m_CurrentPlayerIndex = random.randi() % get_child_count()

	# Start playback of the selected audio stream player
	var selectedStreamPlayer : AudioStreamPlayer = get_child(m_CurrentPlayerIndex) as AudioStreamPlayer
	selectedStreamPlayer.play()

# Stop the audio collection playback
func Stop() -> void:
	if (m_CurrentPlayerIndex != NO_STREAM_PLAYER):
		var currentStreamPlayer : AudioStreamPlayer = get_child(m_CurrentPlayerIndex) as AudioStreamPlayer
		currentStreamPlayer.stop()
To enable the continuity of the audio stream playback, I connected all audio streams to their finished signal so that when one audio clip ends, the next one begins. By the way, if you are not familiar with the concept of Signals in Godot, you can read another article I wrote: How to Use Signals for Node Communication.
# Initialize the AudioCollection node
func _ready() -> void:
	_ConnectStreamSignals()

# Connect all AudioStreamPlayer children to the 'finished' signal
func _ConnectStreamSignals() -> void:
	for child in get_children():
		# Connect all AudioStreamPlayer children to the 'finished' signal to allow audio continuity
		var audioStreamPlayer : AudioStreamPlayer = child as AudioStreamPlayer
		audioStreamPlayer.finished.connect(_OnAudioStreamFinished)

# Callback function for handling stream finished playing events
func _OnAudioStreamFinished() -> void:
	Play()
Finally, to wrap this script nicely, I added a warning so that you or any other developer wouldn’t get confused about how to use this type of node. I implemented the _get_configuration_warnings() method, which validates the number and types of children the node currently has. Remember, the AudioCollection node must have at least one child, and all of its children must be of the ‘AudioStreamPlayer’ type.
Note: For the editor warnings to work, you must mark the script as @tool, otherwise it will not display the warnings in real time.
# Editor node warning for an illegal node configuration
func _get_configuration_warnings() -> PackedStringArray:
	if (get_child_count() == 0):
		# The AudioCollection node does not contain any children
		return ["The audio collection must contain at least one AudioStreamPlayer node"]
	else:
		for child in get_children():
			if (not (child is AudioStreamPlayer)):
				# At least one of the AudioCollection's child nodes has an incompatible type
				return ["Audio collection's child nodes must be of type AudioStreamPlayer"]

	# The node's configuration is legal
	return []
Implementing the AudioManager Class in GDScript
Create an ‘AudioManager’ scene and script and add the script to the root node in the scene. Once you have the AudioManager.tscn file, you can add it to the Autoload list in your project’s settings. Now, let’s define some basic constants and variables we need.
extends Node

const MIN_AUDIO_VOLUME : float = 0.0001
const MAX_AUDIO_VOLUME : float = 1.0000

# List of volume levels for audio buses (used as anchor points for fade-in and fade-out effects)
var m_VolumeLevels : Array = []

# Initialize the audio manager
func _ready() -> void:
	for busIndex in AudioServer.get_bus_count():
		# Add the initial volume level of each bus to the list
		m_VolumeLevels.append(db_to_linear(AudioServer.get_bus_volume_db(busIndex)))
The m_VolumeLevels array stores the current volume levels of each audio bus. This is necessary to ensure that the fade-in and fade-out effects work correctly. When the fade-out effect is applied to a bus, the volume will decrease from the current level to zero. Conversely, the fade-in effect will gradually increase the volume from zero to the value of the target bus in m_VolumeLevels.
Next, we add methods for controlling the bus count and simple volume. Each time a volume change is requested, the actual bus volume is updated, along with the m_VolumeLevels array.
# Returns the number of available audio buses
func GetBusCount() -> int:
	return AudioServer.get_bus_count()

# Returns the volume level (0.0 - 1.0) of the requested bus
func GetVolume(busIndex : int) -> float:
	return m_VolumeLevels[busIndex]

# Set the volume level (0.0 - 1.0) of the requested bus
func SetVolume(busIndex : int, volume : float) -> void:

	# Adjust the volume levels if they are out of bounds
	if (volume < MIN_AUDIO_VOLUME): volume = MIN_AUDIO_VOLUME
	if (volume > MAX_AUDIO_VOLUME): volume = MAX_AUDIO_VOLUME

	# Set the volume of the requested audio bus
	m_VolumeLevels[busIndex] = volume
	AudioServer.set_bus_volume_db(busIndex, linear_to_db(volume))
Now let’s add the custom fade-in and fade-out effect methods. The effect is achieved by interpolating the volume of the target bus over time using a method tweener. The _ChangeAudioBusVolume(value: float, busIndex : int) method is called multiple times during the fade effect, each time with a different value.
# Perform a fade-in effect on the requested bus
func EffectFadeIn(busIndex : int, duration : float) -> void:
	create_tween().tween_method(_ChangeAudioBusVolume.bind(busIndex),
		linear_to_db(MIN_AUDIO_VOLUME), linear_to_db(m_VolumeLevels[busIndex]), duration)

# Perform a fade-out effect on the requested bus
func EffectFadeOut(busIndex : int, duration : float) -> void:
	create_tween().tween_method(_ChangeAudioBusVolume.bind(busIndex),
		linear_to_db(m_VolumeLevels[busIndex]), linear_to_db(MIN_AUDIO_VOLUME), duration)

# Change the volume of a specific audio bus (tweened method)
func _ChangeAudioBusVolume(value: float, busIndex : int) -> void:
	AudioServer.set_bus_volume_db(busIndex, value)
Finally, we add convenience methods for accessing Godot’s built-in bus effects and applying them to a specific audio bus. These methods are not necessary, but having a wrapper with all audio-related functions is very convenient.
# Add an audio effect to a specific bus. Returns the index of the new effect
func AddBusEffect(busIndex : int, effect : AudioEffect) -> int:
	AudioServer.add_bus_effect(busIndex, effect)
	return AudioServer.get_bus_effect_count(busIndex) - 1

# Remove an audio effect from a specific bus
func RemoveBusEffect(busIndex : int, effectIndex : int) -> void:
	AudioServer.remove_bus_effect(busIndex, effectIndex)

# Enable / disable an audio effect on a specific bus
func ToggleBusEffect(busIndex : int, effectIndex : int, enable : bool) -> void:
	AudioServer.set_bus_effect_enabled(busIndex, effectIndex, enable)

# Enable / disable an audio effect on a specific bus
func IsBusEffectEnabled(busIndex : int, effectIndex : int) -> bool:
	return AudioServer.is_bus_effect_enabled(busIndex, effectIndex)
How to Use the Audio System We Built
Congratulations for completing the implementation of the audio system in your project! Now it’s time to actually test and use it. I have implemented everything I wrote here in a small 2D platformer game example. In the following sections, I outline how I created this project and explain how to use this simple audio system.
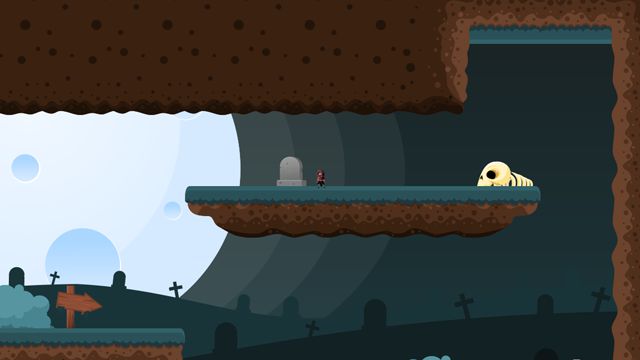
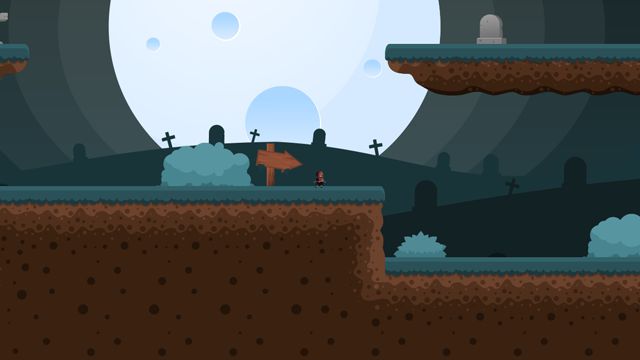
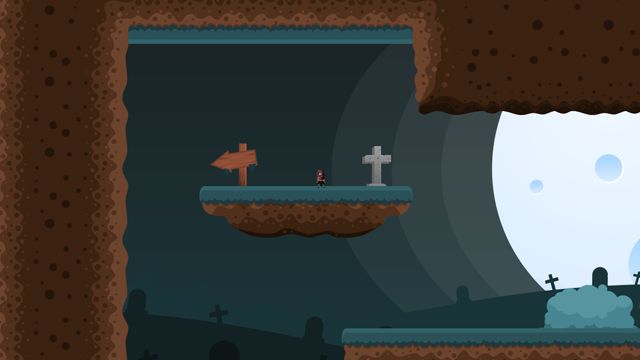
Setting up the Project: Importing Assets and Building the Game World
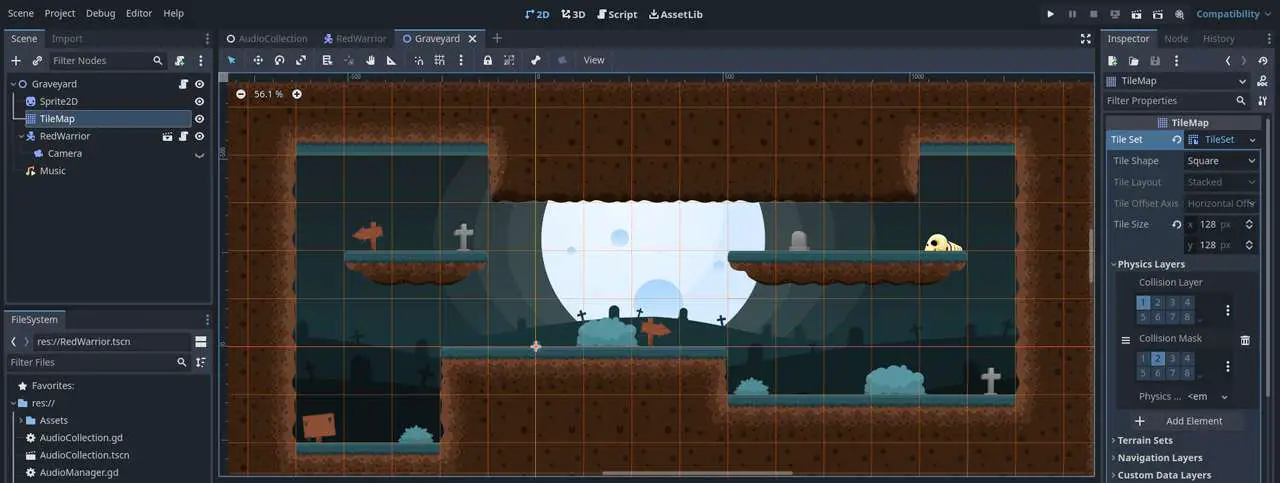
For the level scene (called ‘Graveyard’), I created a Tilemap node that has the level ground, platforms, and decorations. The tileset used in this project is the Free Graveyard Tileset created by pzUH. Thanks!
Next, I created the player scene (called ‘RedWarrior’), imported the character movement animation sprite sheets, and created all character animations.
Implementing the Player Scene and Defining User Inputs
The character movement and user input require the definition of input actions and the implementation of the player’s state machine. The player has four states: Idle, Run, Jump, and Fall.
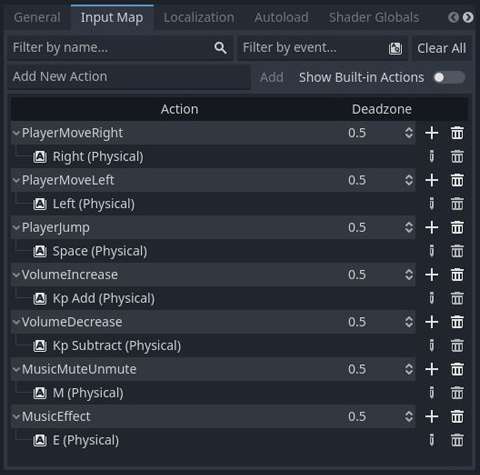
The player has the following actions: PlayerMoveRight, PlayerMoveLeft, and PlayerJump.
In addition to the player input actions, I also added specific keys for controlling the background music volume, music fade-in and fade-out effects, and applying an effect to the background music (reverb).
Adding Background Music and Player Footsteps Sounds
Now that we have a simple game, let’s add the music and sounds. I imported a song that will suit the atmosphere in my world scene and added it under the root node of my level scene. The song used as background music is called “This is Halloween“. Credits to UNIVERSFIELD. Thank you!
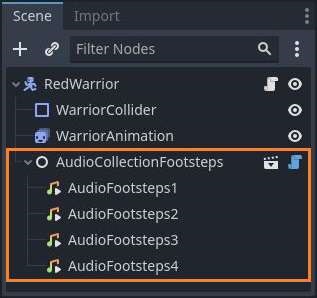
Finally, I added four different footstep sounds to the player under an AudioCollection instance and set the playback order to ‘Random’. This way, when the player moves, the footsteps sound will be chosen randomly, providing the character sounds with more variety and depth. The footsteps sounds were provided by InspectorJ. Thanks!
Of course, to ensure that the footsteps sounds play only when the player runs left or right, some changes are required in the Player script. When the player state changes to ‘Run’, the footsteps sound collection starts playing. And when the state changes from ‘Run’ to some other state, the audio collection stops.
A Small Demo of the Audio System Project in Godot
Conclusion
If you have come this far, you are awesome! You are well on your way to becoming a great software and game developer. The information below will help you continue on this path and lead you to glory!
Where Did I Get All of the Information for This Article?
The information in this article was sourced from various channels, including YouTube, Godot’s official documentation, Godot community forums, my personal experience as a software developer, and my experience in game development with Godot. Here are some of the sources I used:
- Organize Sound In Godot 4 by Cadoink on YouTube.
- Volume Settings Tutorial For Godot 4 by Cadoink on YouTube.
- Audio & Music in the Godot Game Engine by Gamefromscratch on YouTube.
- Sound Effects in 3 Minutes by GameDev with Drew on YouTube.
- Audio Buses on the Godot official documentation website.
- Audio Effects on the Godot official documentation website.
- Get Configuration Warnings Method on the Godot official documentation website.
Additional Topics You Might Want to Explore
There were several interesting topics I encountered during my research that might be relevant to certain games. If your game revolves around audio, such as in the case of Guitar Hero, you might require a more precise audio system to synchronize graphics rendering with the audio. You can find more information here: https://docs.godotengine.org/en/stable/tutorials/audio/sync_with_audio.html.
For those developing large games with more complex audio requirements, I recommend exploring the Godot Mixing Desk. This plugin offers a robust audio solution for Godot with numerous capabilities that I couldn’t cover in this article. You can check it out here: https://github.com/kyzfrintin/Godot-Mixing-Desk.
Where Can You Learn Game Development?
The audio component is a vital part of game development, but it’s just one role among many that you need to assume as a game developer. I am an experienced software developer who transitioned to game development.
I have written numerous articles about game development and the Godot game engine. If you would like to learn about Godot signals, user interfaces, tilemaps, and more, visit my Night Quest Games Blog and start reading. Good luck!
If the information in this article was helpful to you, please consider supporting this blog through a donation. Your contributions are greatly appreciated and allow me to continue maintaining and developing this blog. Thank you!


