A Tilemap is a convenient way of creating levels or scenes using a sprite sheet (sometimes called an Atlas image). A sprite sheet is a single large image that contains multiple smaller images or textures packed together. These smaller images can be sprites, icons, UI elements, or any other graphical elements used in a game. For more information about sprite sheets, go to How to Use Sprite Sheets to Improve 2D Games.
Tilemaps allow you to make not only 2D scenes but also fancy stuff like isometric or even hexagonal tiles. In this article, we will talk about tilemap layers. I will describe what tilemap layers are, why we need them, two methods of creating tilemap layers, and conclude with an example of creating layers from GDScript code.
What Are Tilemap Layers in the Godot Engine?
Tilemap layers allow you to group tiles into separate layers and control each layer’s properties individually. For example, you can control the visibility, color modulation, or Y-sorting of each layer. You could also define a Z-index for each layer so you can create physical layers in your game. It’s like making a layer cake, except with tiles. This gives you much more flexibility in creating levels than just sticking all tiles on top of each other. You can access the tilemap layers through the Godot 2D editor or from the GDScript code.
What Are Tilemap Layers Good For?
Nothing. Just kidding! Tilemap layers could be used for several things. Here are some examples of use cases.
Physical Layering
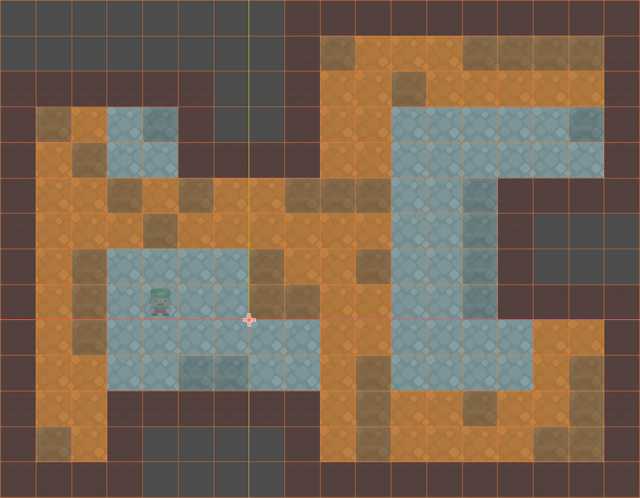
Drawing several layers of tiles, each one with its own Z-index. This is especially useful in isometric games, where you simulate a 3D environment with 2D graphics.
Example: Layers could define the boundaries between terrain, ground objects, and aerial objects. Specifying the Z-index for each layer will correctly display each tile, independent of the order of object creation or their movement.
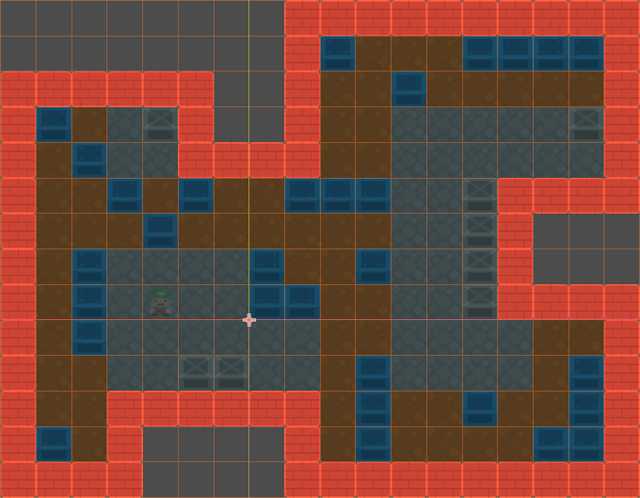
Logical Layering
Applying unique logic for each layer in code. Since tiles are grouped into layers, you could apply different logic for each layer at game runtime. Logical layering can be applied to all kinds of 2D scenes.
Example: Logical layering could be used for defining the borders of a level. You can define a layer for the border of a level and a layer for the inner tiles of a level. The “Border” tiles could be defined as something the player can’t pass through or move, while the “Inner” tiles can be moved, destroyed, or modified, depending on your game. This logic is checked at runtime during player movement.
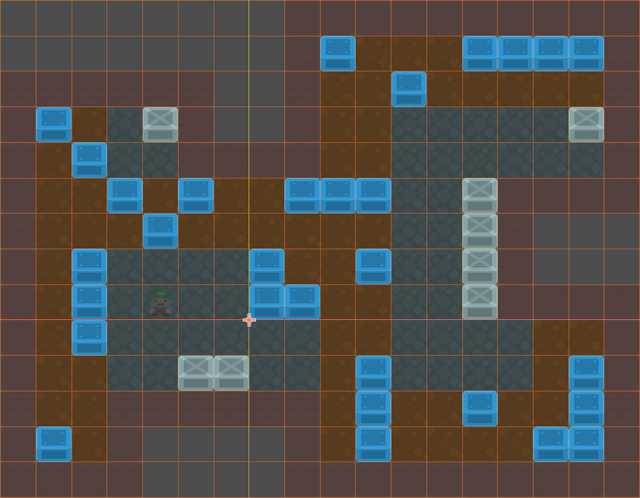
Visual Layering
Visual layering could be achieved by changing the visual properties of the layer, like the modulation property. This is good for emphasizing objects or creating some visual effects.
Example: Using the modulation property, you could change the saturation or color tint of the layer objects to notify the player that these objects were disabled or changed in some way.
Creating Tilemap Layers From the Godot Editor
Assuming you added a Tilemap node to your scene, here are the steps for creating layers.
Step 1: Adding the Required Layers to the Tilemap
- Select the Tilemap node from the ‘Scene’ panel.
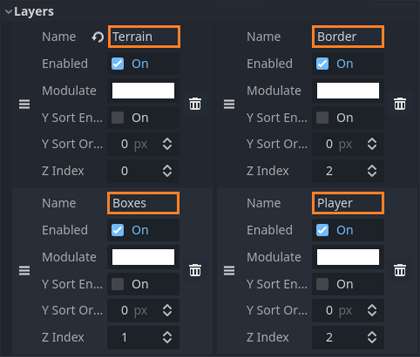
- Open the ‘Layers’ section in the ‘Inspector’ panel.
- To add a layer, click on the ‘Add Element’ button, and you will see a new layer appear.
- Give the new layer a suitable name, representing the objects that will be in that layer.
Note: You can add as many tilemap layers as you need, just don’t add too many; otherwise, you might get lost in the layer mess.
Step 2: Selecting the Tilemap Layer You Want to Edit
- Select the Tilemap node from the ‘Scene’ panel.
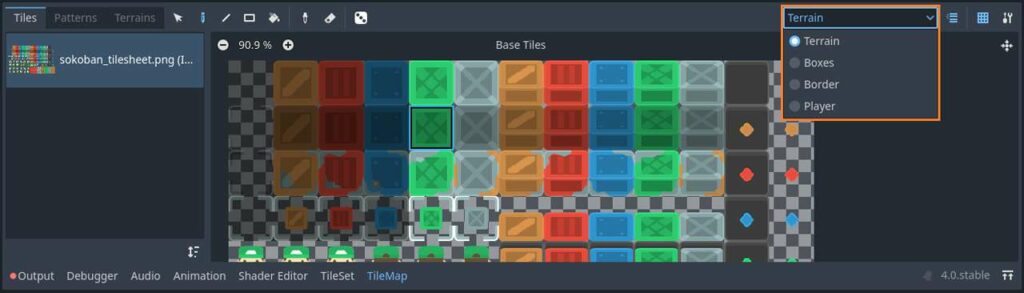
- Click on the ‘Tilemap’ tab at the bottom of the screen. Here you will see all the tiles you can use in your scene.
- At the top of this window, you will see a drop-down box containing a list of all the layers you have created. Select the layer you want to edit.
Once you select a layer, the main scene view will focus on the layer you selected. All other layers in the tilemap node will be somewhat transparent so the current layer is emphasized.
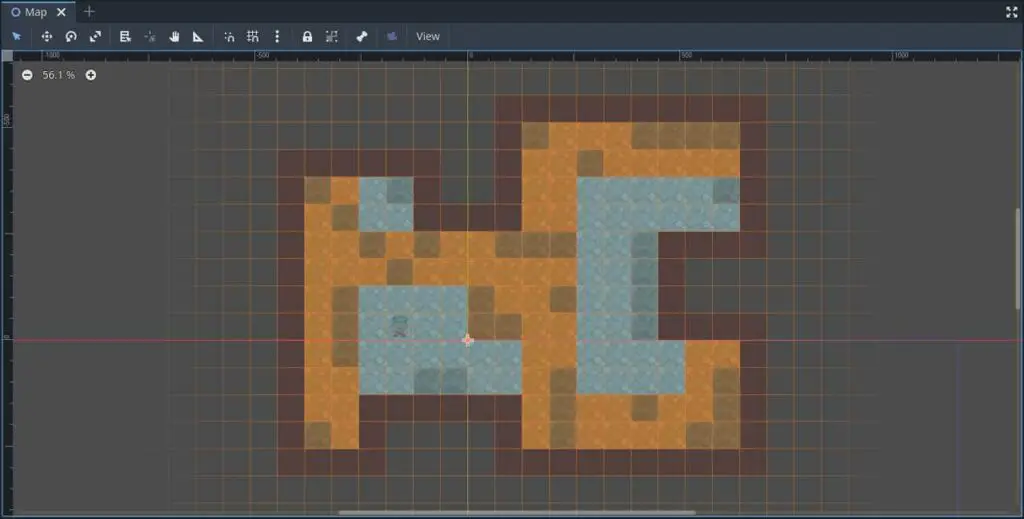
Step 3: Selecting Tiles and Painting the Scene
Once the layer you want to modify is selected, click on the tile you want to draw and start adding tiles to your scene. When you are done painting this layer, move on to the next one until all your layers are completed.
Step 4: Fine-Tune Layer Properties
Go back to the ‘Layers’ section in the ‘Inspector’ panel and modify the properties of each layer you defined. If you want to change the colors of a layer, you can play with the modulation property. If you want to define physical layers, you can modify the Z-index property according to the height of your objects. Higher Z-index values will be drawn last, which means they will be drawn on top of the lower Z-index objects.
Accessing and Manipulating Tilemap Layers From GDScript
In this section, I will describe some situations where you would need to access the tilemap node and all of its contents from GDScript code and how to do it.
Why Do I Need to Access Tilemaps From GDScript?
Accessing the inner structures and data of a tilemap may be very useful in some situations. For example, when you want to create tilemaps dynamically at runtime. This is sometimes called ‘Procedural Generation’. Instead of having to create every map by hand, you define an algorithm that dynamically creates maps as the player progresses through the game, according to predefined rules.
Another example is to import prepackaged tilemaps. In large or complex games, you might want to separate the tilemap data from the game logic. To do this, you need to export the tilemap data to a file and import it when a game starts. The export function happens only once when the game is created and is loaded each time a player starts the game.
This technique gives you a lot of flexibility in terms of the different content you can push into the game. You can even swap files containing the tilemap data without changing the core game logic. The entire process of exporting and importing data must be done through the code, so accessing and modifying tilemap objects is crucial.
The last example I will give here is changing tile properties during the game. There are cases where your game requires modification of tile properties, like visual changes (for example: transparency), logical changes (for example: objects can be solid or players may go through them), tile movements, rotation, or any other logic you might want to apply based on player behavior.
How Do I Change or Query the Tilemap Layers From My GDScript Code?
The following list contains the most useful methods for manipulating tilemap layers. Keep in mind that each of these methods must be called from a script that extends the Tilemap class.
add_layer(index): Adds a new layer to the tilemap. This method only adds a new entry to the layer list. If you want to change its properties, you must manually call the setter method you want. For example, to set the layer name, you must call theset_layer_name(index, name)method.clear_layer(index): Clears all tiles from the layer. This method keeps the layer entry itself in the list and only removes the tiles you already added to this layer.get_layer_name(index): Returns the name of the layer at the requested index in the list.set_layer_name(index, name): Sets the name of the layer at the requested index in the list.remove_layer(index): Removes a layer from the list, including all of its tiles.move_layer(oldIndex, newIndex): Moves a layer to a different index in the list. This method might affect the drawing order of the layers in your tilemap.set_layer_enabled(index, enabled): Enables or disables the layer at the given index. Don’t forget to use this method when creating a new layer to make sure it is enabled. Disabled layers will not be rendered at all.get_layers_count(): Returns the number of layers in the list.
There are many more tilemap methods which you can use. I have listed only the most useful ones. If you want to see the full list, go to the official Godot documentation at https://docs.godotengine.org/en/stable/classes/class_tilemap.html#methods.
Example of Creating New Layers in GDScript
extends TileMap

const LAST_LAYER_INDEX : int = -1

func _ready() -> void:
	_PushNewLayer("Terrain", 0)
	_PushNewLayer("Boxes", 0)
	_PrintLayerNames()

# Push a new tilemap layer to the end of the layer list
func _PushNewLayer(layerName : String, zIndex : int) -> void:
	add_layer(LAST_LAYER_INDEX)
	set_layer_enabled(LAST_LAYER_INDEX, true)
	set_layer_name(LAST_LAYER_INDEX, layerName)
	set_layer_z_index(LAST_LAYER_INDEX, zIndex)

# Print all layer names currently found in the tilemap layer list
func _PrintLayerNames() -> void:
	for layerIndex in range(get_layers_count()):
		print("Layer %d: %s" % [layerIndex, get_layer_name(layerIndex)])
Frequently Asked Questions
What Is the Different Between a Tilemap and a Tileset in Godot?
In the Godot game engine, a Tileset is a grid of sprites, which act as a template for all tile instances. It contains the grid properties, as well individual tile properties and parameters. On the other hand, a tilemap is the object containing the actual tile instances. The tilemap will usually contain multiple instances of each tile, as they were defined in the Tileset.
Can I Add or Edit Tilemap Layers From GDScript?
Yes. Godot allows you to access the Tilemap layers from GDScript using specific APIs. You can add, remove and modify layers and their parameters from the GDScript code. You can see the commonly used APIs in this article, or go to the official Godot documentation at https://docs.godotengine.org/en/stable/classes/class_tilemap.html#methods.
How Do I Create a Tilemap Layer in Godot?
There are two options for creating a tilemap layer: through the Godot editor, or writing the code in GDScript. The simplest way is to define it in the Godot editor by creating a Tilemap node, configuring the tileset, adding a new layer in the ‘Layers’ section of the Inspector panel, setting up the layer parameters (name, z-index, etc. ), selecting the active layer by going to the ‘Tilemap’ tab at the bottom of the screen and choosing the layer from the drop-down box. The last step is drawing the actual tiles on the map.
Final Words
Tilemaps are a great tool for creating 2D games, and they are used extensively by game developers in the Godot community. The official Godot documentation about Tilemaps has a pretty good resource with examples if you want to learn more about it: https://docs.godotengine.org/en/stable/tutorials/2d/using_tilemaps.html.
After you finish setting up your tiles, you might need to add collision to allow the player to interact with your game world. This topic in Godot 4 is not as easy as it sounds. Want an easy guide on how to add collision to your tilemaps? Check out my article on How To Easily Add Collision to Your Tilemaps in Godot 4 for more information.
If you are just starting out with game development and you want to develop your skills quickly, keep reading my blog at Night Quest Games Blog. There you will find useful articles about tilemaps, Godot, and other interesting topics. Good luck!
If the information in this article was helpful to you, please consider supporting this blog through a donation. Your contributions are greatly appreciated and allow me to continue maintaining and developing this blog. Thank you!


