The 2D Room Transition camera moves between rooms when the player gets close to the edges of the screen. This makes the game really interesting since the player doesn’t know what is in the next room. There could be an enemy there, ready to kill you, or there could be useful items that will help you as you go through the level.
In this tutorial, you will learn how to create a Room Transition Camera with smooth movement that follows the player as they transition between rooms. I assume you are using a tilemap to create your level. If not, don’t worry, the camera implementation I describle will still work.
How does the 2D Room Transition Camera Work in Godot?
We have four directions the player can transition to: up, down, left, and right. To detect if a player is close to an edge of the screen, we will use an Area2D node, which will detect a collision with the player. And since we have four directions, we will need four Area2D nodes. Once the player hits one of those areas, the camera will smoothly move in the correct direction.
Step 1: Building a 2D World Scene Where the Camera will Exist
The first thing you need to do is set up your world, player, and any other scenes you need in your game. It’s important to develop the world and player first so that you can test each step of the camera development. If you don’t have a base framework for the game, I suggest you implement it first and add the camera later.
Step 2: Creating the RoomTransitionCamera Scene
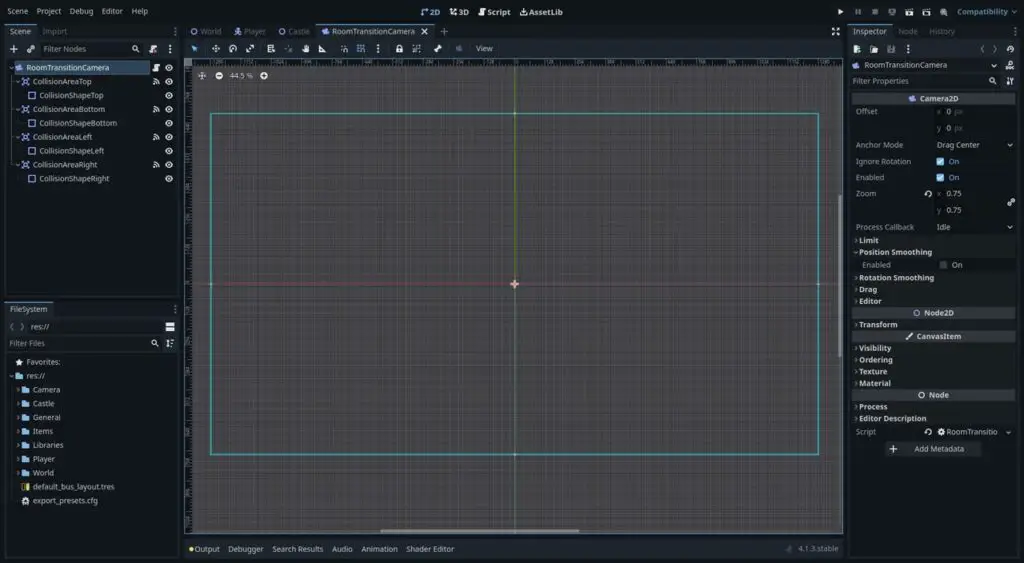
Let’s start by creating a new scene based on a Camera2D node and following these steps:
- Rename the root node to ‘RoomTransitionCamera’.
- Create an Area2D node and add a CollisionShape2D node as its child. The CollisionShape2D node will define the shape of the collider. In our case, this will be a simple rectangle.
- Duplicate the Area2D node four times, one for each direction, and rename all nodes so that you don’t get confused later on.
- For each of the CollisionShape2D nodes, create a new Shape resource with the ‘RectangleShape2D’ type.
Now we need to define the shape’s size and location in the camera viewport. For the horizontal shapes, set the size to cover the entire width of the camera and the height to a very small amount of pixels (4 – 16 pixels would be enough). For the vertical shapes, set the size to cover the height of the camera and the width to a small number of pixels as well.
Then, move each one of the shapes to its appropriate position in the camera viewport. If the shapes are not aligning with the camera, simply change the grid snap options to suit your camera dimensions. The collision frame must be thin to avoid endless camera transition loops.
The collision won’t work unless you define physics collision layers for the camera and the player. For your convenience, go to your project settings and name the physics layers you currently have in your game. Once that is done, you can go to each Area2D node and assign the collision layers. The ‘Layer’ property is the layer of the Area2D node, while the ‘Mask’ property is the layer you want to collide with.
Note: If you want your camera to have a smooth transition between rooms, enable the camera Position Smoothing.
Step 3: Implementing the Script that Moves the 2D Camera Between Rooms
It’s time to create the script that will contain all the camera’s logic and connect the relevant signals to it. Add a new script to the camera root node and give it a class name of ‘RoomTransitionCamera’.
Now, we need to somehow get notified when the player collides with the edge detection shapes. The body_entered signal found under the Area2D node will be ideal for this purpose. Go to each one of the Area2D nodes and connect the body_entered signal to a method in the script. As a result, you should have four different methods, each called when the corresponding shape collides with the player character.
func _OnBodyEnteredTop(body):
	pass

func _OnBodyEnteredBottom(body):
	pass

func _OnBodyEnteredLeft(body):
	pass

func _OnBodyEnteredRight(body):
	pass
Okay, now we are going to implement the room transition logic. To keep track of the current room, define a Vector2 variable that stores the coordinates of the current room the camera is pointing at.
Next, we need to define how many pixels the camera moves when transitioning to the next room. If we move the camera by the viewport size, the player will be outside of the visible area. So the camera movement should be less than the viewport size, but not too low so it feels like the camera just moved slightly. It should feel like a room transition, where most of the screen is changed.
If you define the values properly, the player should overlap between rooms and exist in the current one as well as in the next one. This will depend on your character’s size and might take some experimentation.
Once the movement offsets are set, we need to implement a local method that will update the camera position based on the current room and the player’s movement direction. Finally, call this method from each one of the signal callback methods with the appropriate direction value.
const HORIZONTAL_OFFSET : int = 56
const VERTICAL_OFFSET : int = 64

# Camera movement offsets, considering camera zoom
@onready var m_CameraHorizontalMovement : int = get_viewport_rect().size.x / get_zoom().x - HORIZONTAL_OFFSET
@onready var m_CameraVerticalMovement : int = get_viewport_rect().size.y / get_zoom().y - VERTICAL_OFFSET

# Update the camera position based on the given direction
func _UpdateCameraPosition(direction : Vector2) -> void:
	m_CurrentRoom += direction
	set_position(m_CurrentRoom * Vector2(m_CameraHorizontalMovement, m_CameraVerticalMovement))

func _OnBodyEnteredTop(body):
	_UpdateCameraPosition(Vector2.UP)

func _OnBodyEnteredBottom(body):
	_UpdateCameraPosition(Vector2.DOWN)

func _OnBodyEnteredLeft(body):
	_UpdateCameraPosition(Vector2.LEFT)

func _OnBodyEnteredRight(body):
	_UpdateCameraPosition(Vector2.RIGHT)
Step 4: Defining a Target Node for the Camera
The code assumes that the camera is located at the center of the world scene, which is not always the case. If you move the camera and run the game, you will notice that the transition is not working well.
To fix that, we need to inform the camera about the player’s offset from the center of the world scene. A good approach is to create an exported Node2D variable representing the target node the camera should align to. Later on, we will set the target to be the player node.
Define a variable that stores the offset from the world’s origin point. In the _ready method, store the target’s offset and align the camera position to it. Finally, in the update camera position method, add the offset from the origin every time the camera moves. This ensures the camera is always centered on the room where the player is located.
@export var TargetNode : Node2D = null

# Initialize the offset from the origin point
var m_OriginOffset : Vector2 = Vector2.ZERO

func _ready():
	m_OriginOffset = TargetNode.get_position()
	set_position(m_OriginOffset)

func _UpdateCameraPosition(direction : Vector2) -> void:
	m_CurrentRoom += direction
	set_position(m_OriginOffset + m_CurrentRoom * Vector2(m_CameraHorizontalMovement, m_CameraVerticalMovement))
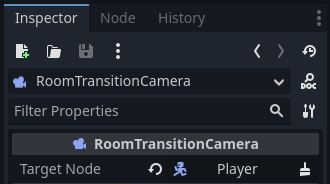
Go to your world scene and create a new instance of the RoomTransitionCamera scene. In the camera’s inspector panel, you will see the target variable we defined in the script.
Drag the player node from the scene tree into that property. Now, the camera will track the player node when moving between rooms.
Step 5: Testing the Game and Adjusting the World Scene
If you followed this tutorial and tested your game, there is a high chance you noticed misalignment between the camera and your tilemap rooms. This issue requires some manual work. You should build the rooms carefully so that they align nicely with the camera. Otherwise, you might encounter edge cases like room transitions when the player jumps and then comes back down to the first room.
My Thoughts on the 2D Room Transition Camera in Godot
I enjoy the room transition camera mechanic in games. It’s not just about the camera itself, but also the anticipation and the feeling of not knowing what’s waiting in the next room, even though it’s really close. One of my favorite classic games is Abe’s Oddysee (yes, I’m old). This game, along with many others, served as inspiration for this article.
For more interesting and unique tutorials like this one, visit the Night Quest Games Blog. There, you will find a collection of guides and tutorials about Godot and game development in general. See you there!


